

Sweet and tangy with a buttery shortbread crust, this Lemon Bar Recipe is a memorable, yet easy-to-make dessert.
This post may contain affiliate links. As an Amazon Associate, I earn from qualifying purchases. Please see my disclosure policy for details.
With just a handful of ingredients and a few easy steps, homemade lemon bars are big on flavor but low on fuss. These bars are a rewarding and easy-to-follow beginner baking recipe.
With a buttery sweet shortbread crust and a luscious lemon filling, there's nothing not to love about this favorite dessert recipe!
Lemon bars just scream "summer" to me.
With a cool and velvety lemon filling and a sweet, buttery, and just crunchy enough base, these treats satisfy a sweet tooth while still being balanced and light.
They're the kind of treat I can get into on a summer day or spring afternoon. Just bring a pan of these to any bridal or baby shower and you'll be the star of the show (second to the mom-to-be or bride, of course, though this recipe has the power to change those predictions).
This easy lemon bar recipe is also perfect on a dreary or winter day. One bite -- even just one look -- brings brighter and sun-shinier times immediately.
With less than 7 ingredients and simple to follow steps, these bars are a great beginner recipe, too. Just make sure your butter is softened (you want it smooth and spreadable), use fresh lemon juice, cool the bars before enjoying, and baking victory is yours.
One bite and you'll see what all the fuss is about. Bring your butter to room temperature and start squeezing your lemons because your day is about to get that much better!
Table of contents
- These lemon bars are...
- Ingredients:
- Substitutions:
- How to make lemon bars:
- Recipe pro-tips:
- How to tell when lemon bars are done:
- Can you double the recipe?
- Serving suggestions:
- A serving note:
- Can you make this lemon bar recipe ahead of time?
- How to cut lemon bars:
- How to store the bars:
- Tools needed to make this recipe:
- Other dessert recipes you'll love:
- Get all my new recipes as they drop. Sign up to receive new recipes each week.
These lemon bars are...
- Luscious
- Bright
- Citrusy
- Buttery
- Melt-in-your-mouth tender
They're truly a memorable treat!
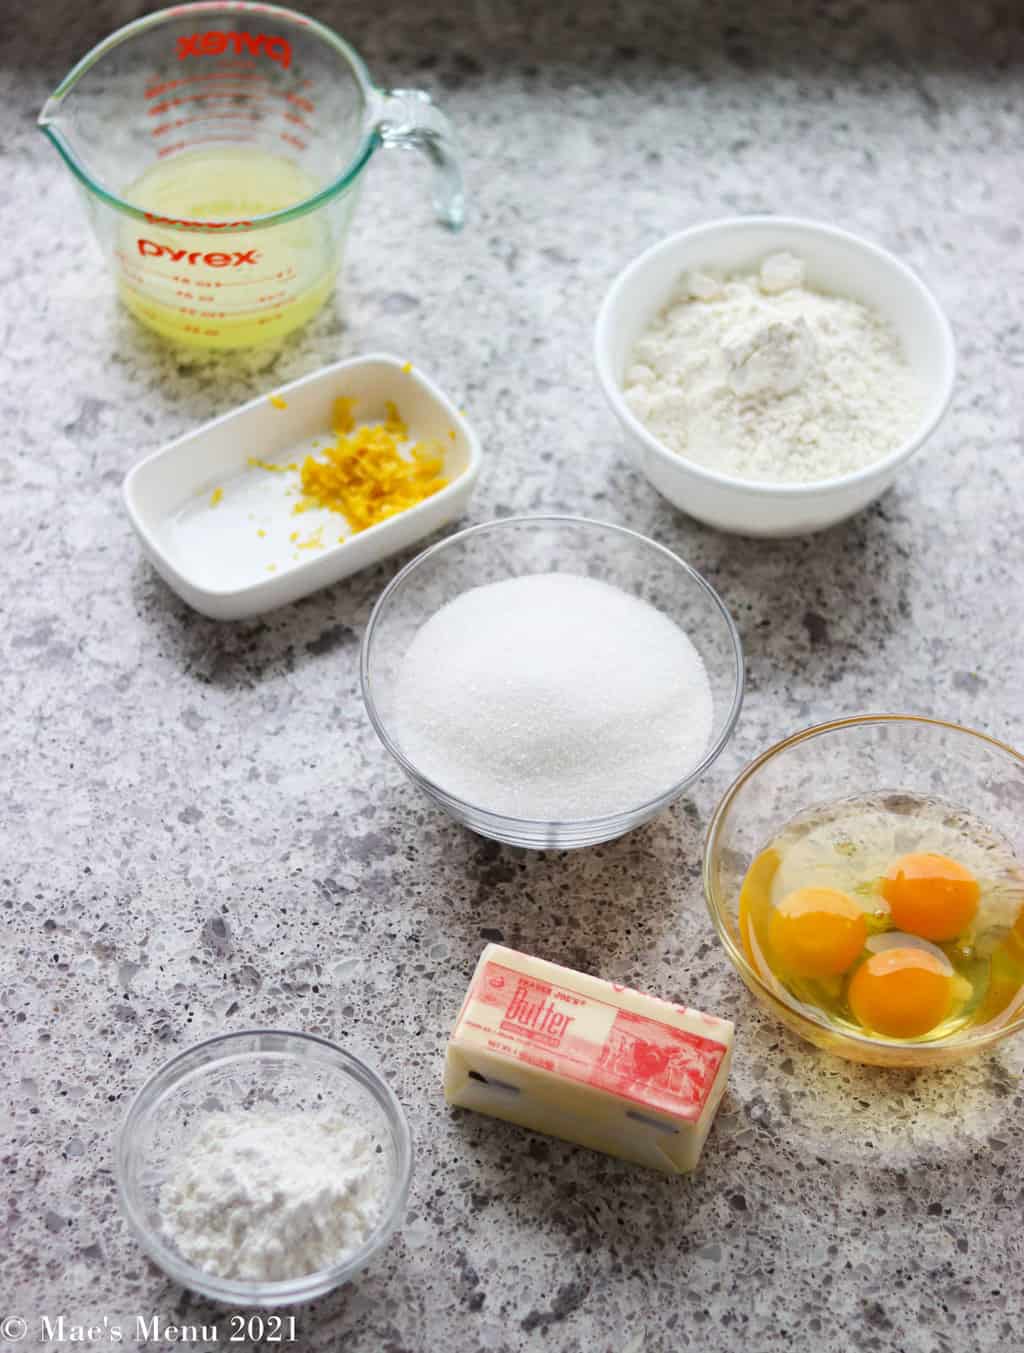
Ingredients:
- Lemon juice - fresh is best
- Granulated sugar
- Unsalted butter - softened to room temperature, or left in a warm spot for 1-1.5 hours
- All-purpose flour
- Cornstarch
- Large eggs
- Lemon zest - use a Microplane to zest off just the top layer of the lemon peel
Substitutions:
- Butter - salted butter can substitute for the unsalted butter, but reduce the salt in the recipe to a heaping ⅛ teaspoon
- Cornstarch - additional all-purpose flour can replace the cornstarch

How to make lemon bars:
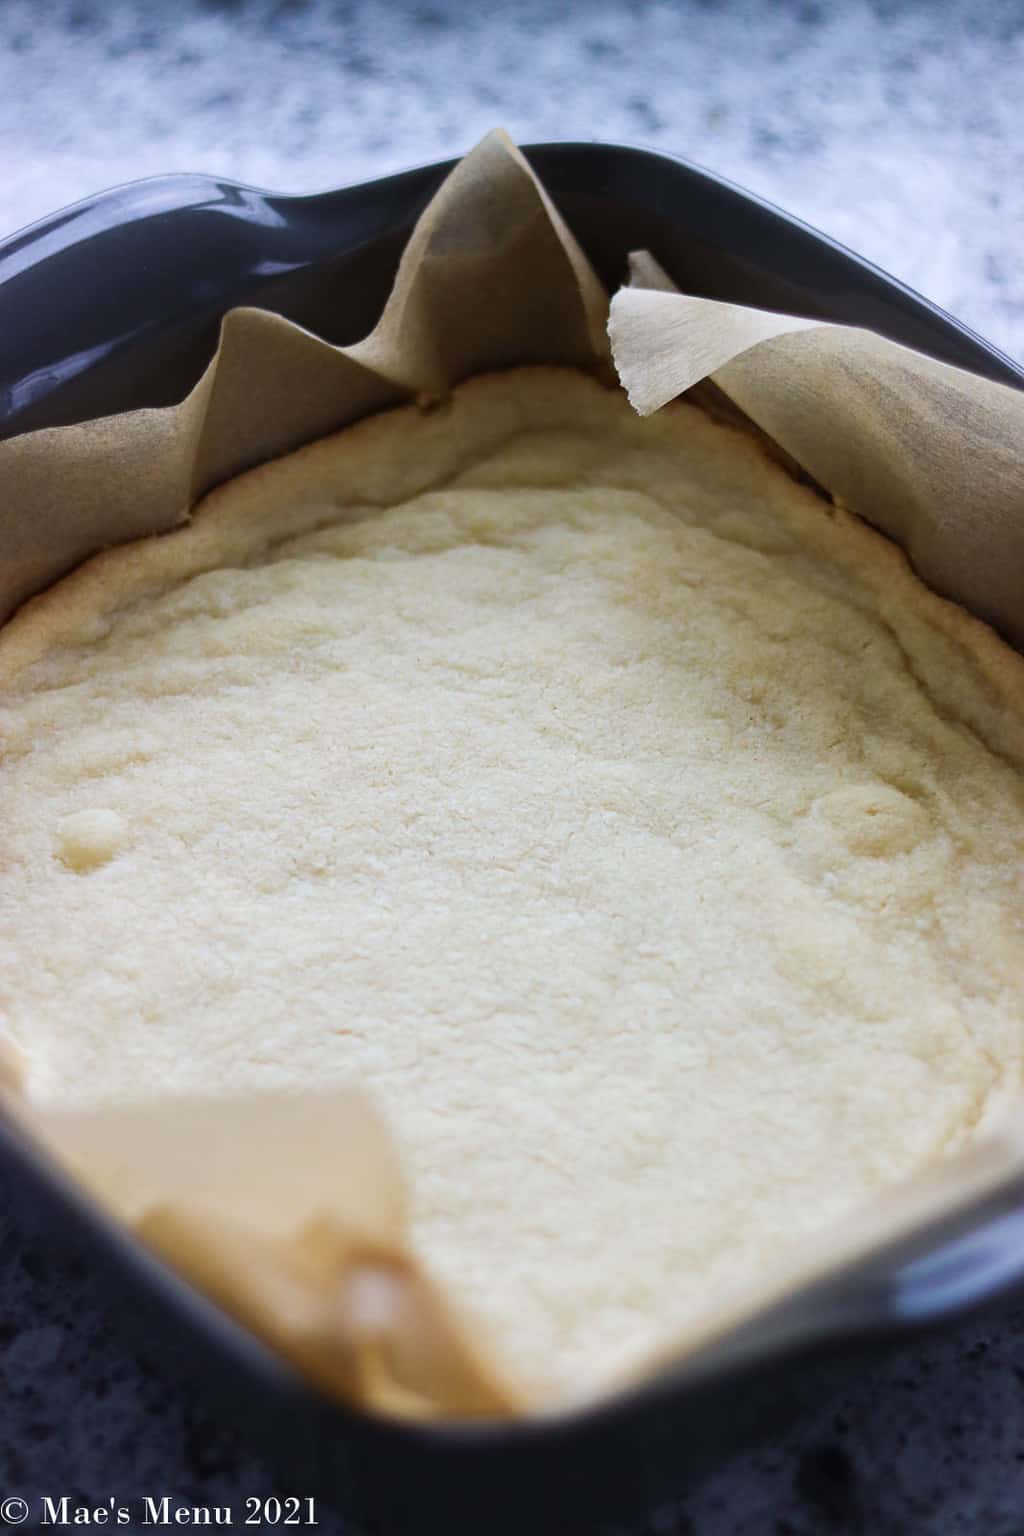
- Line an 8 x 8-inch glass or ceramic baking dish with parchment paper
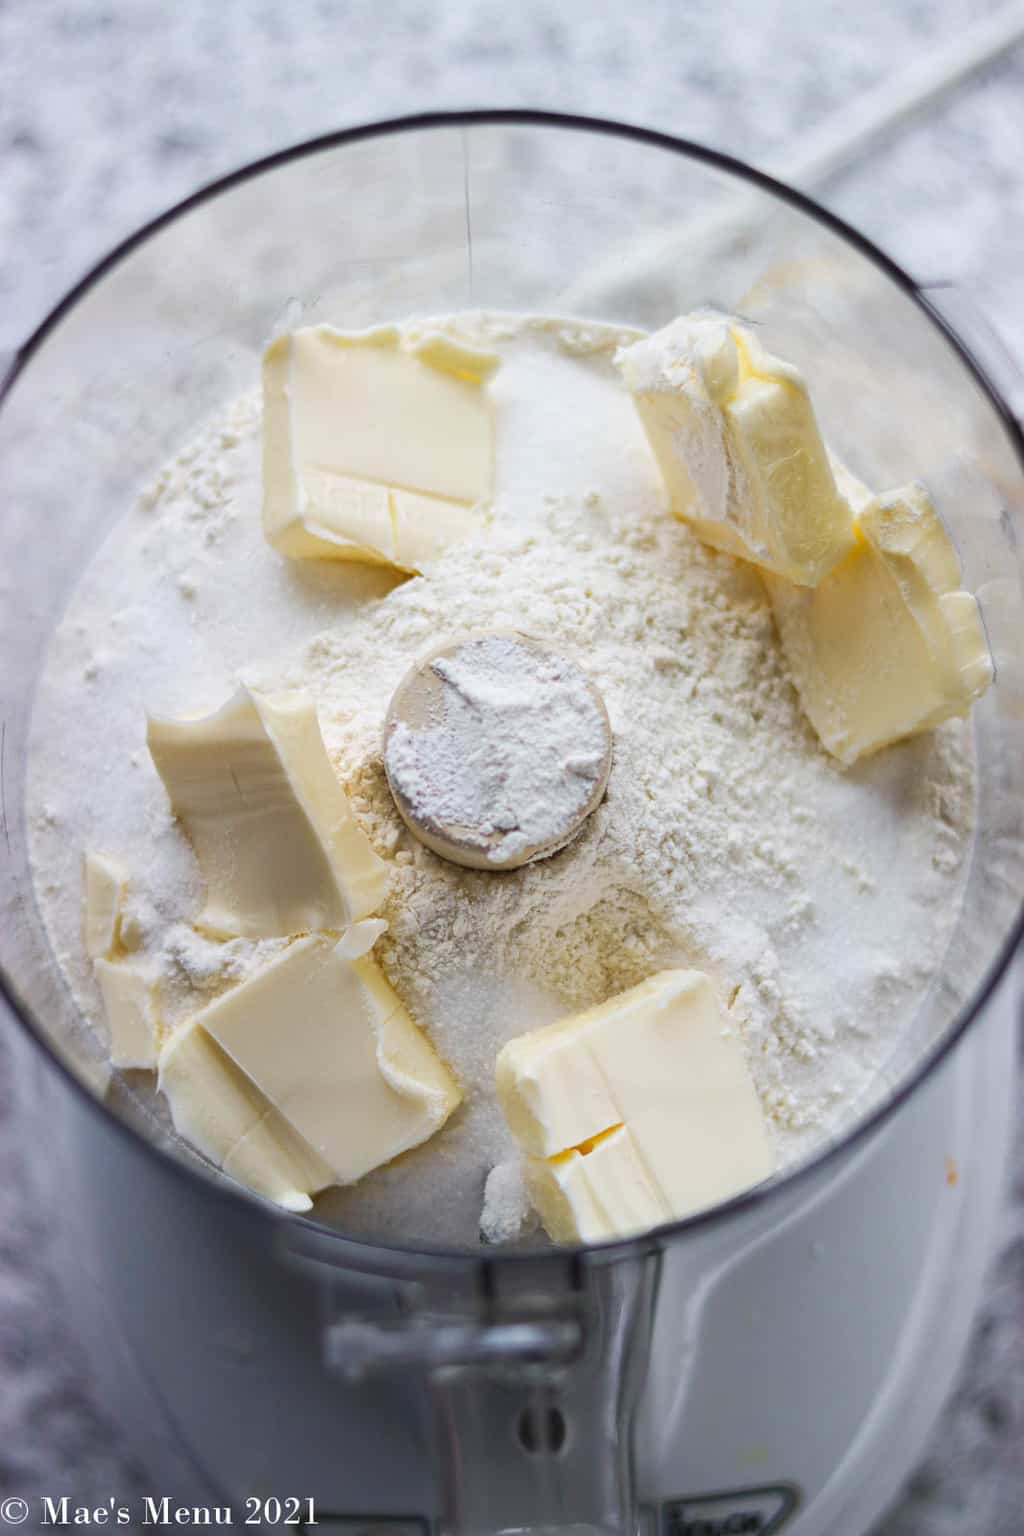
- Pulse the flour, salt, and sugar together in a food processor. Note: see my notes on the recipe card to make these bars without a food processor.
- Add the softened butter to the flour mixture and process until a thick and crumbly dough forms.
- Turn the dough out into the baking dish. Evenly press the dough down into the dish.
- Bake the crust until just golden brown around the edges.
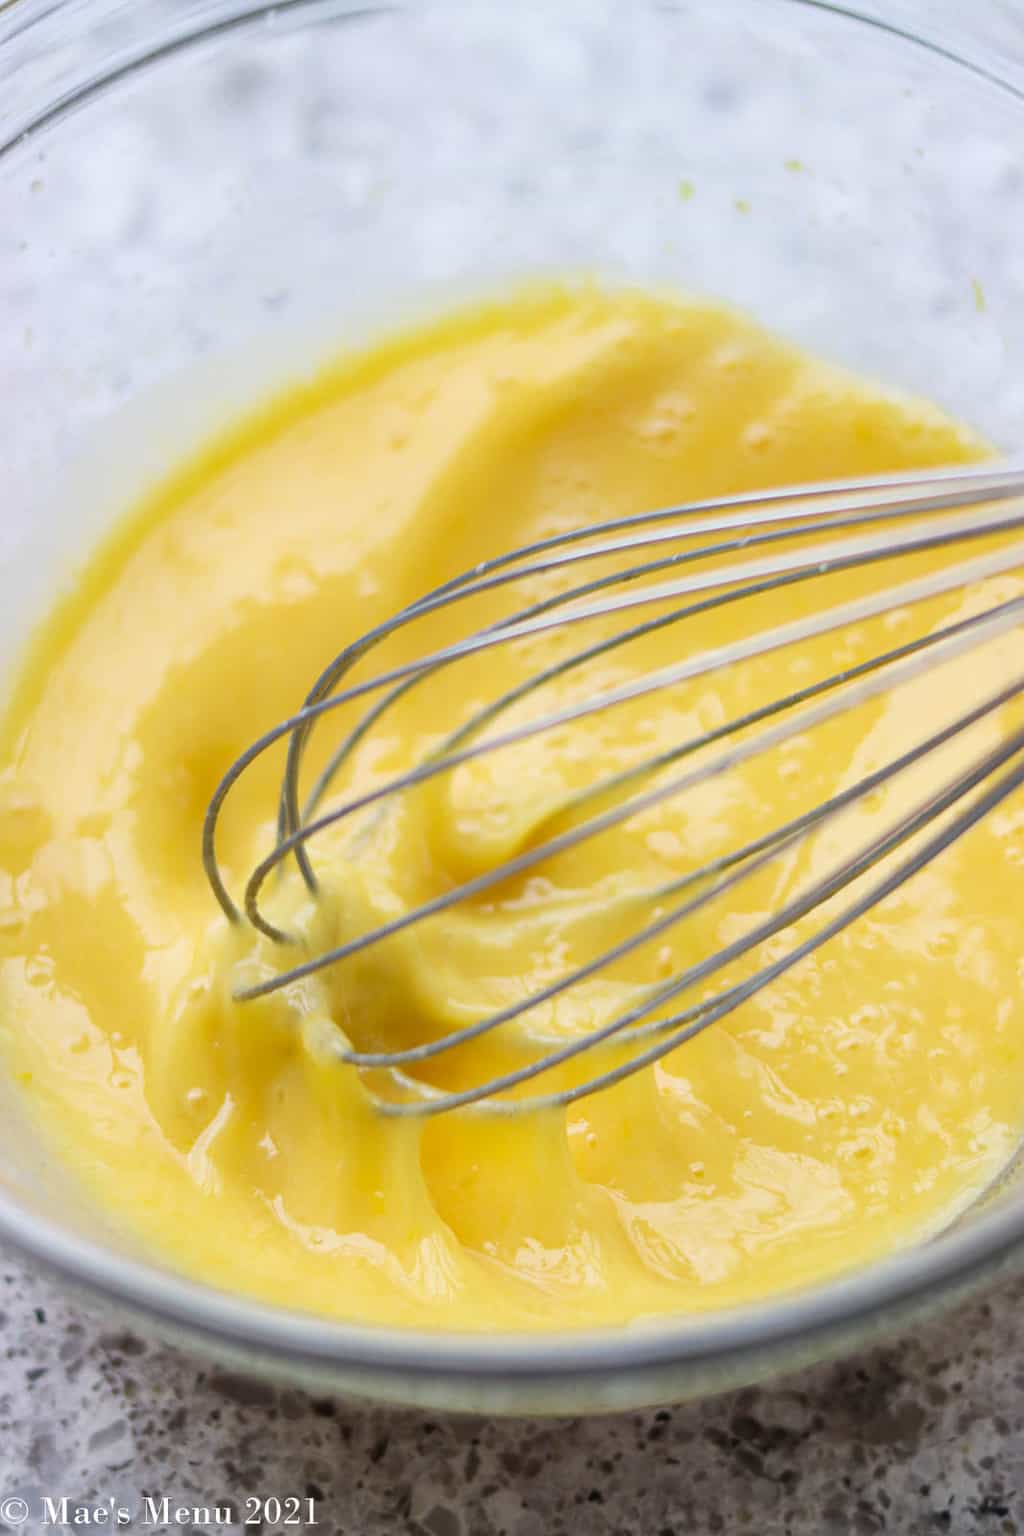
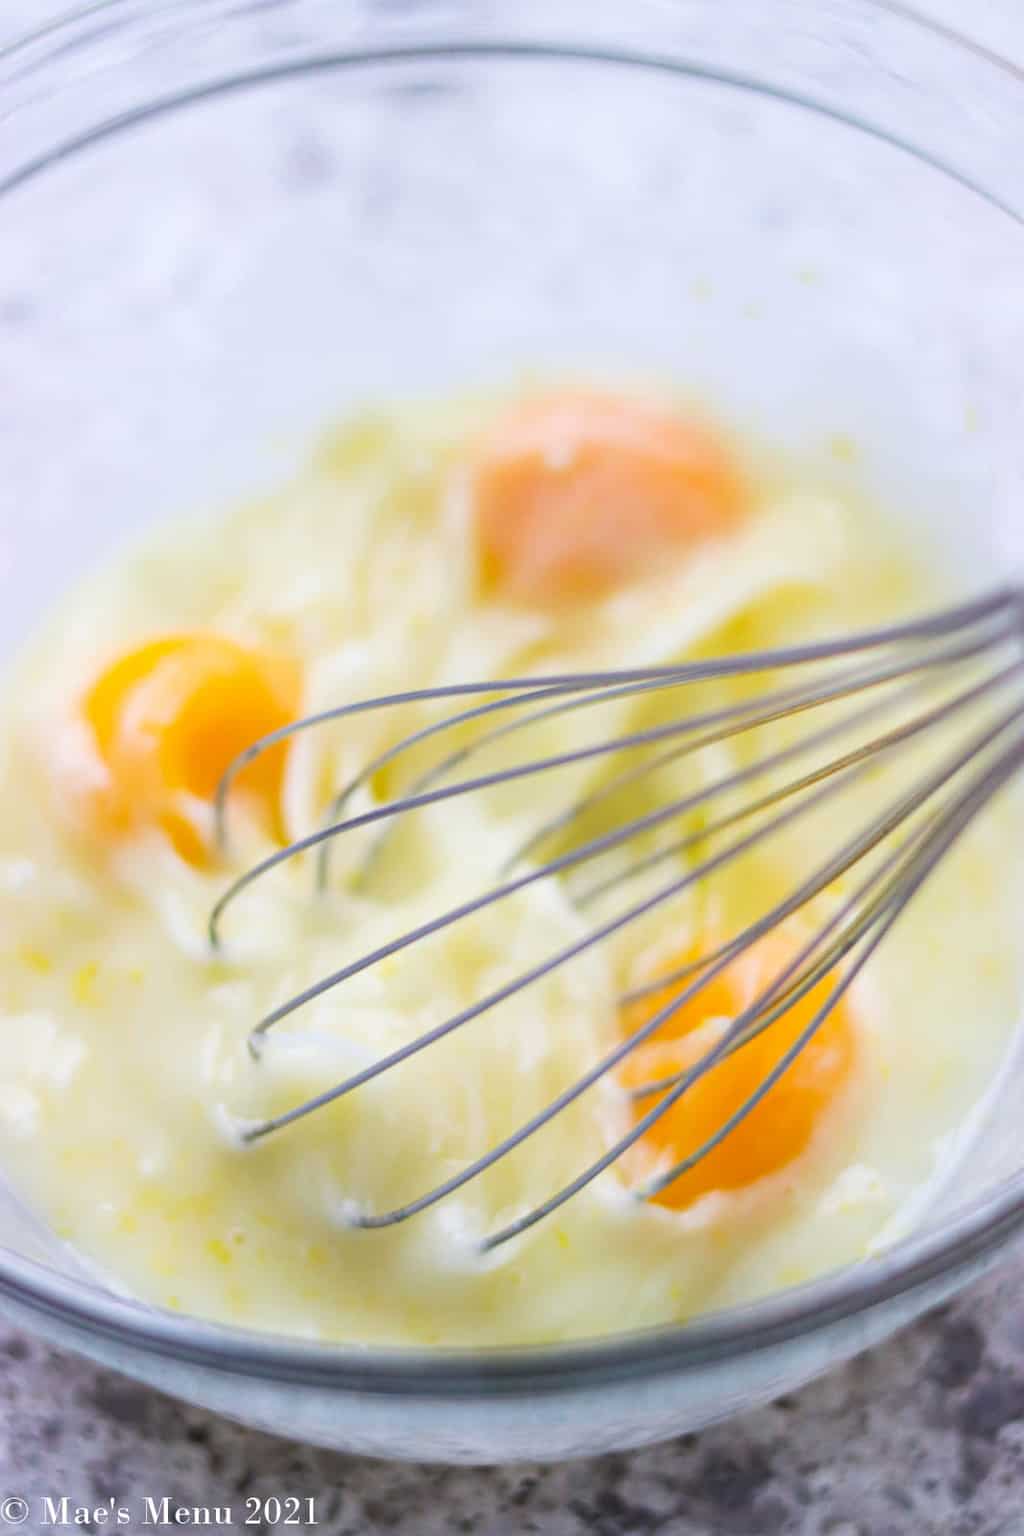
- Whisk together the lemon juice, eggs, cornstarch, lemon zest, and sugar until combined.
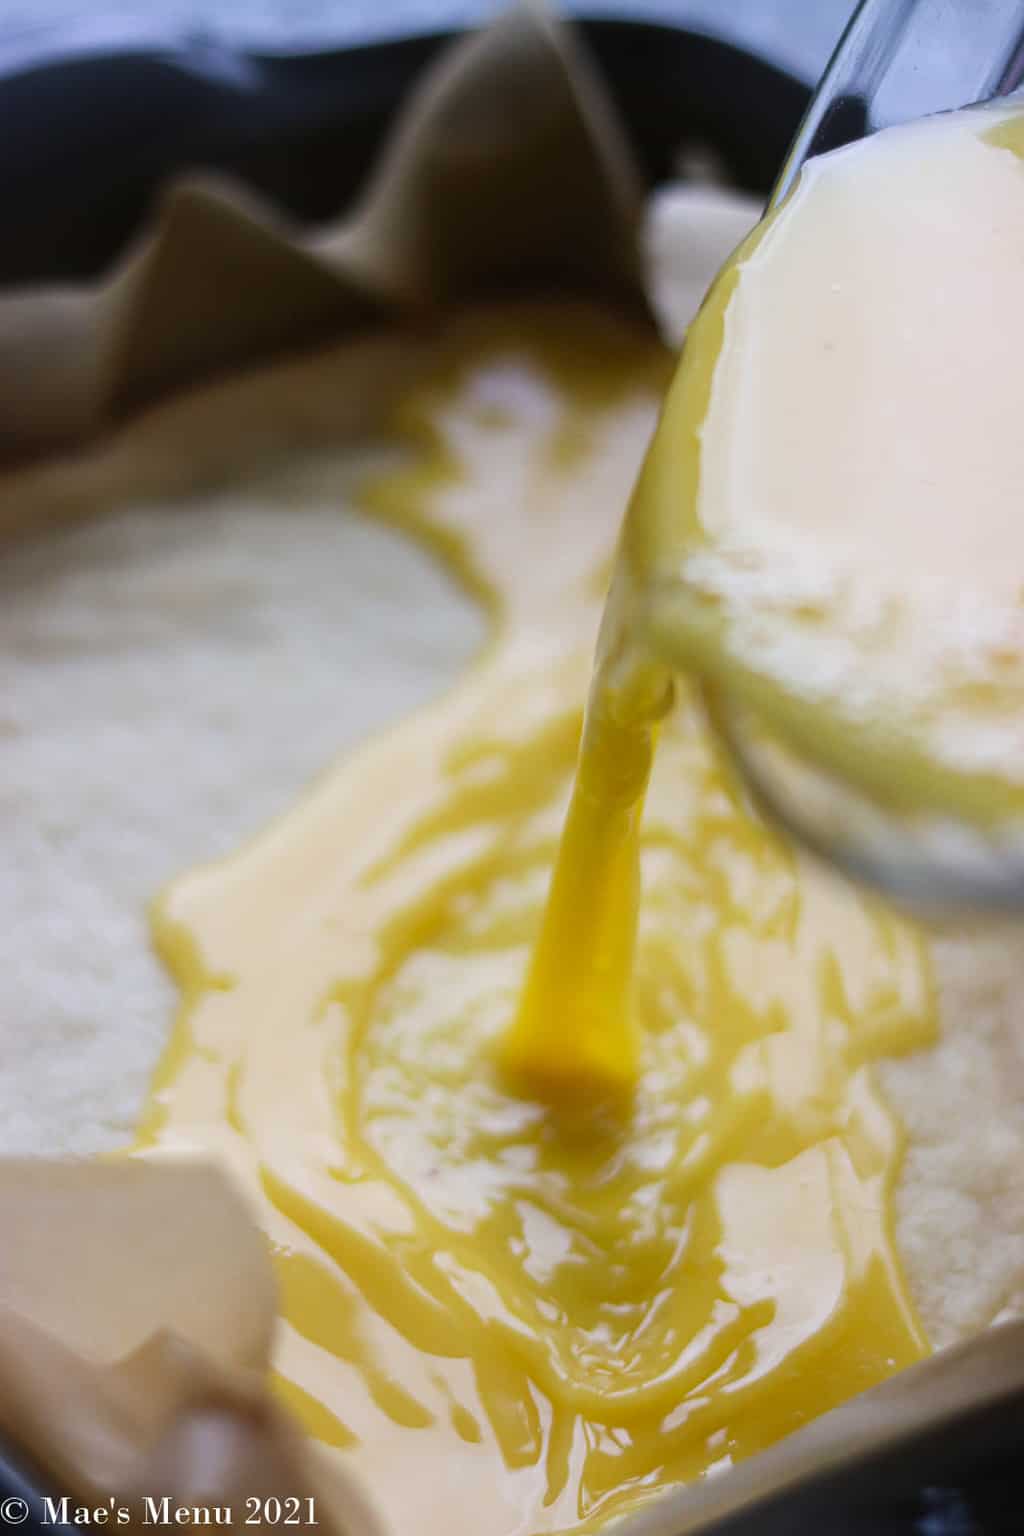
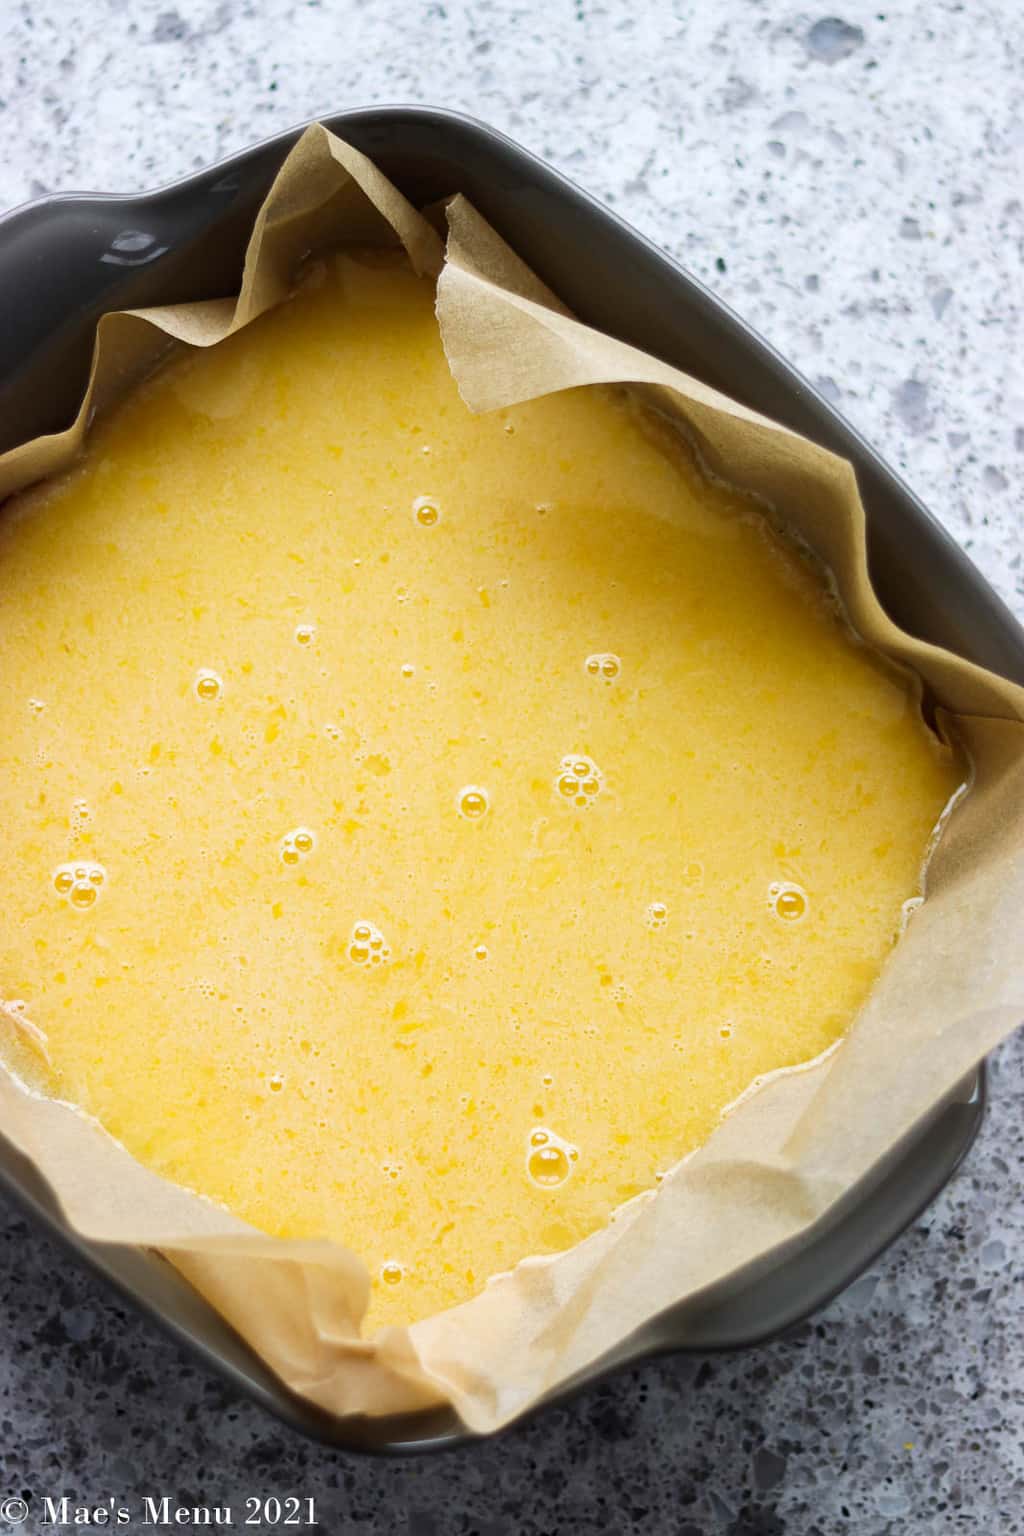
- Pour the lemon filling onto the warm crust. Bake until the filling is firm and jiggles only just slightly when nudged with a potholder.
- Let the lemon bars cool to room temperature. Then cool in the refrigerator until cold and firm.
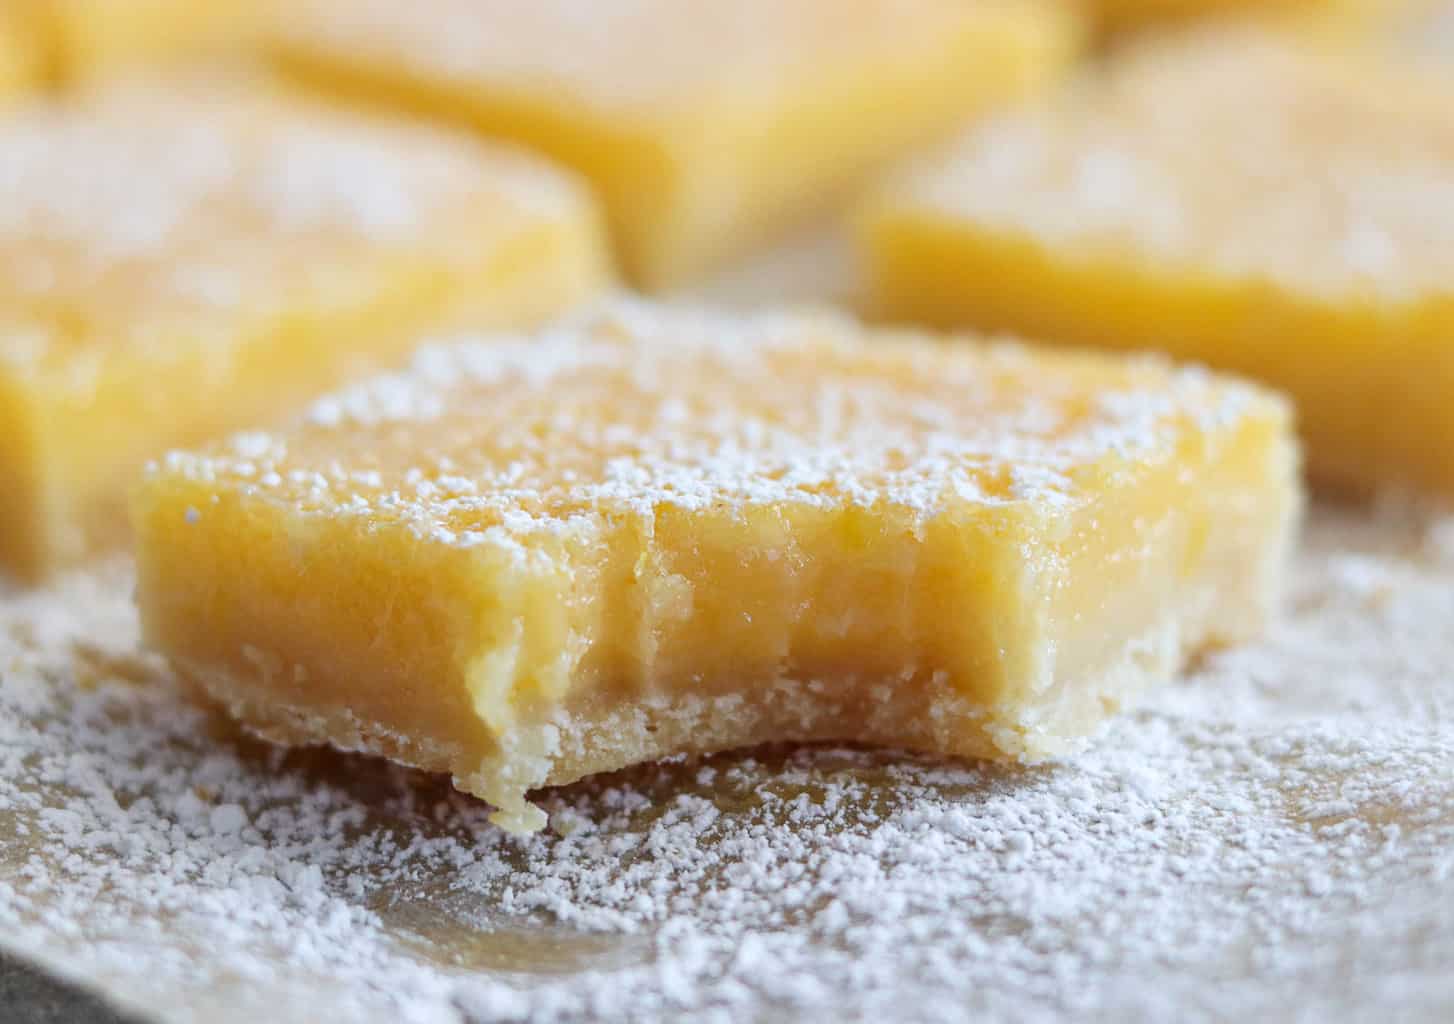
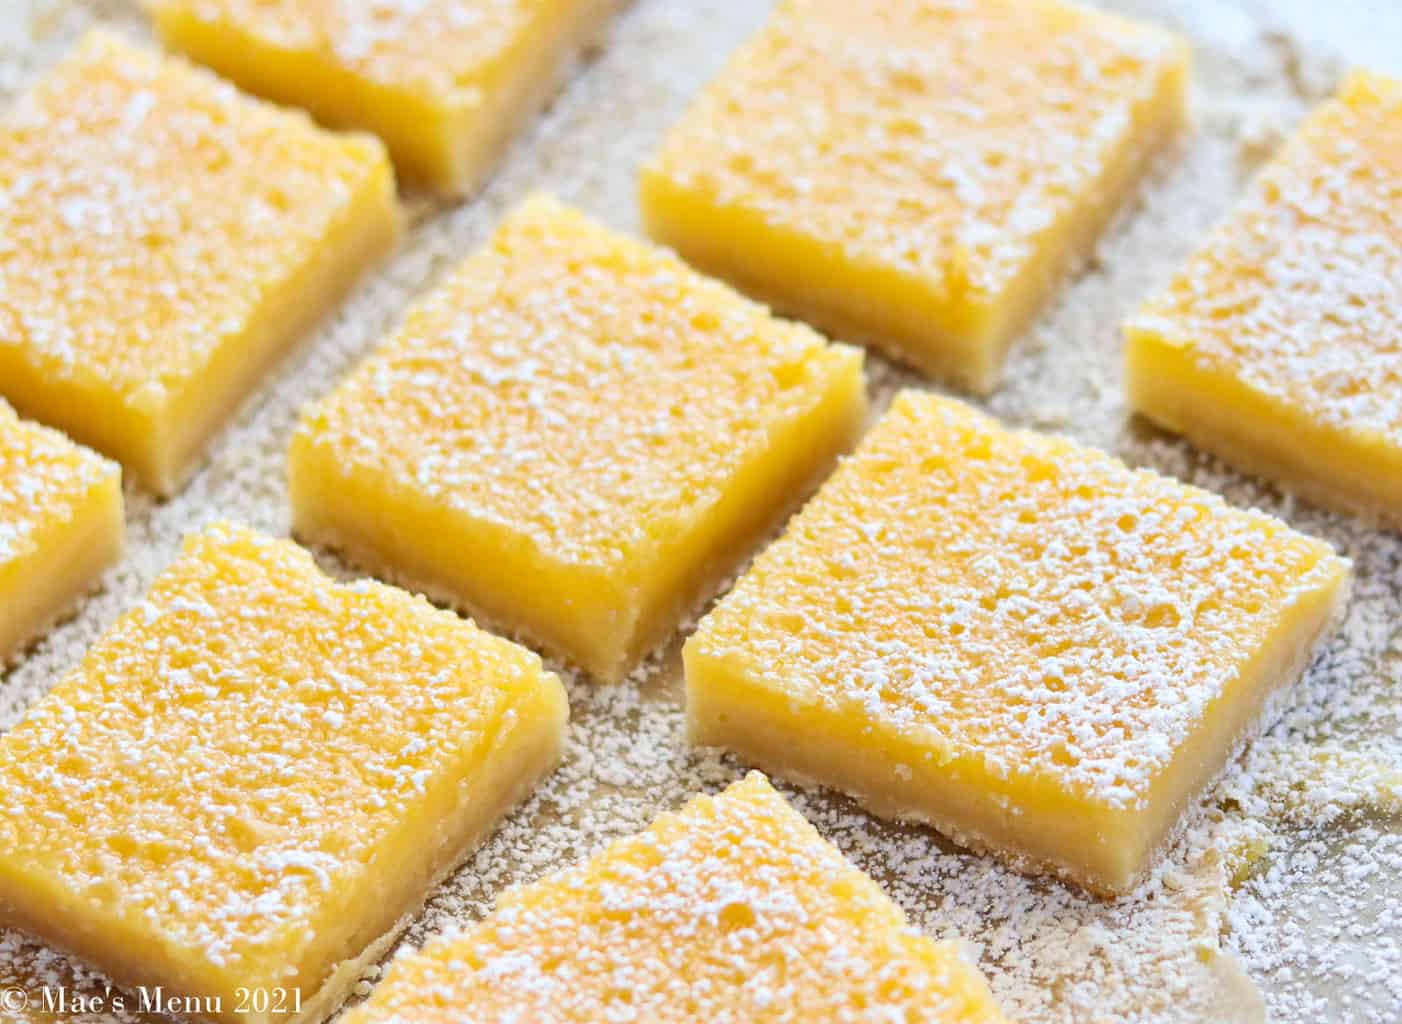
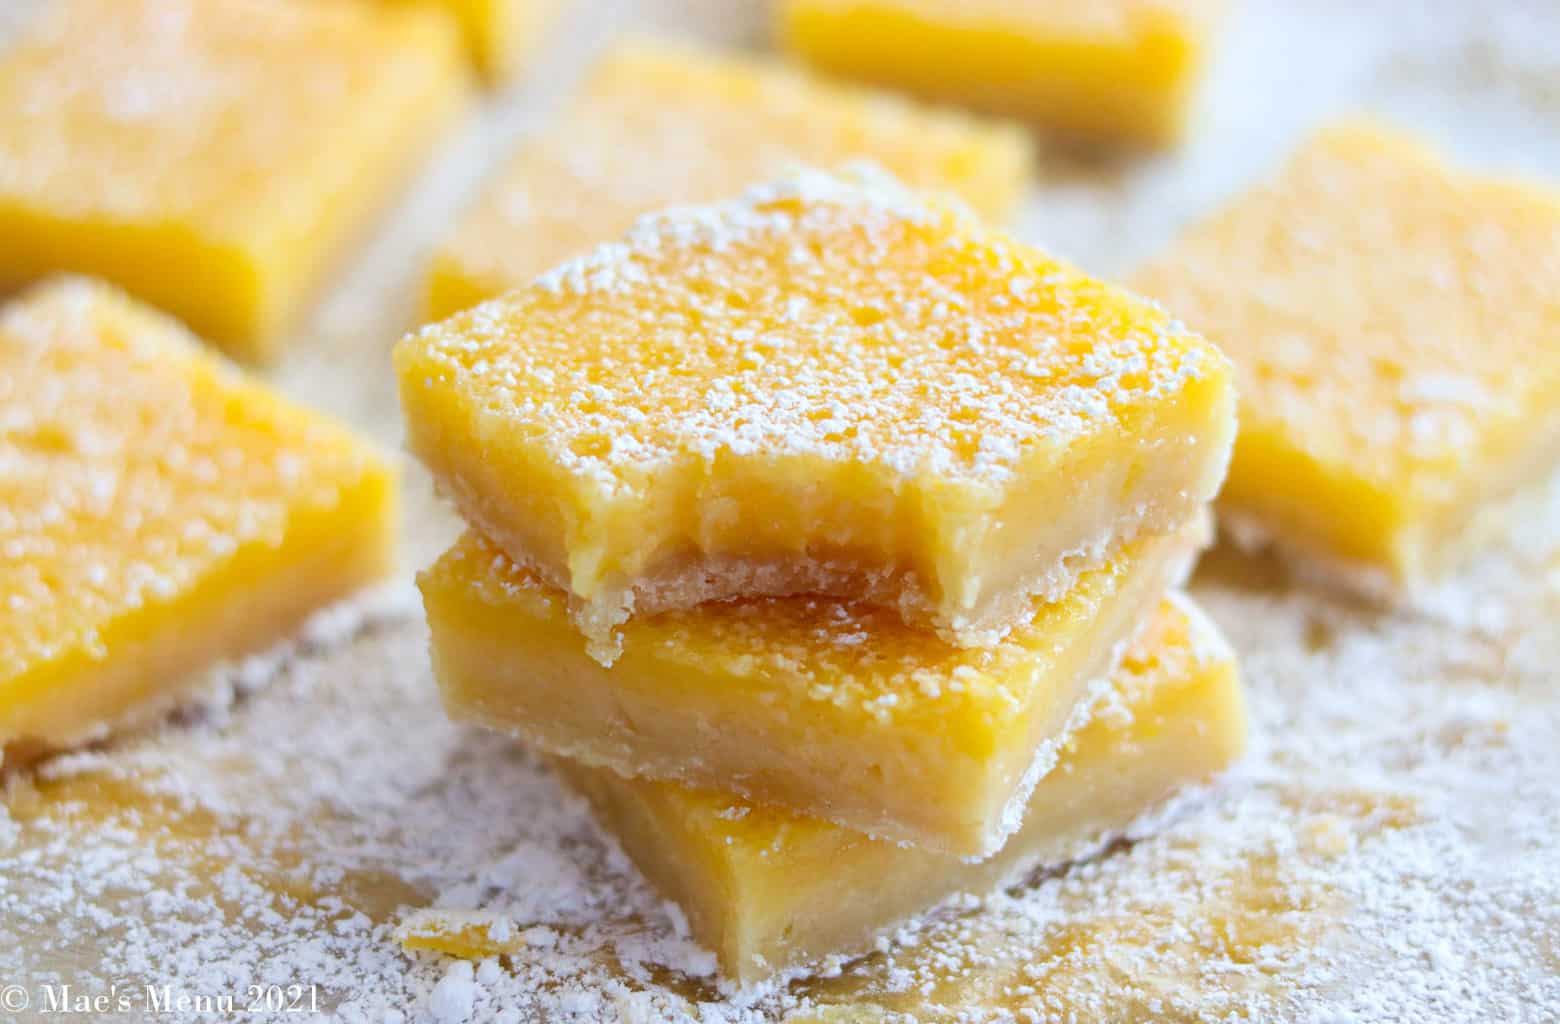
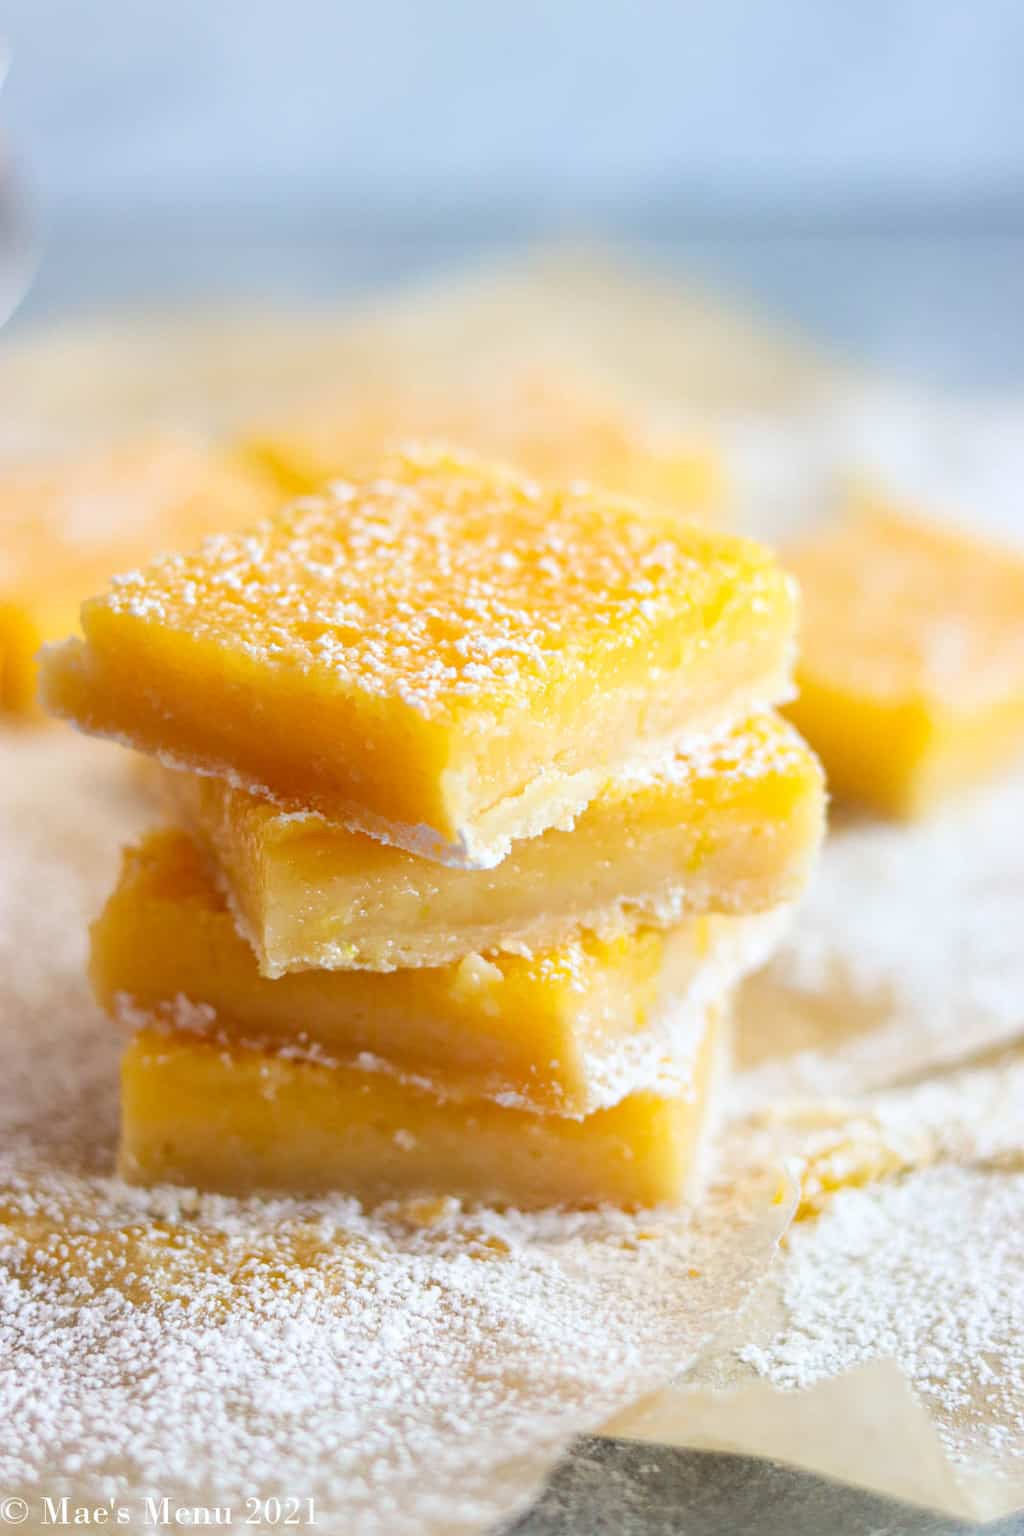
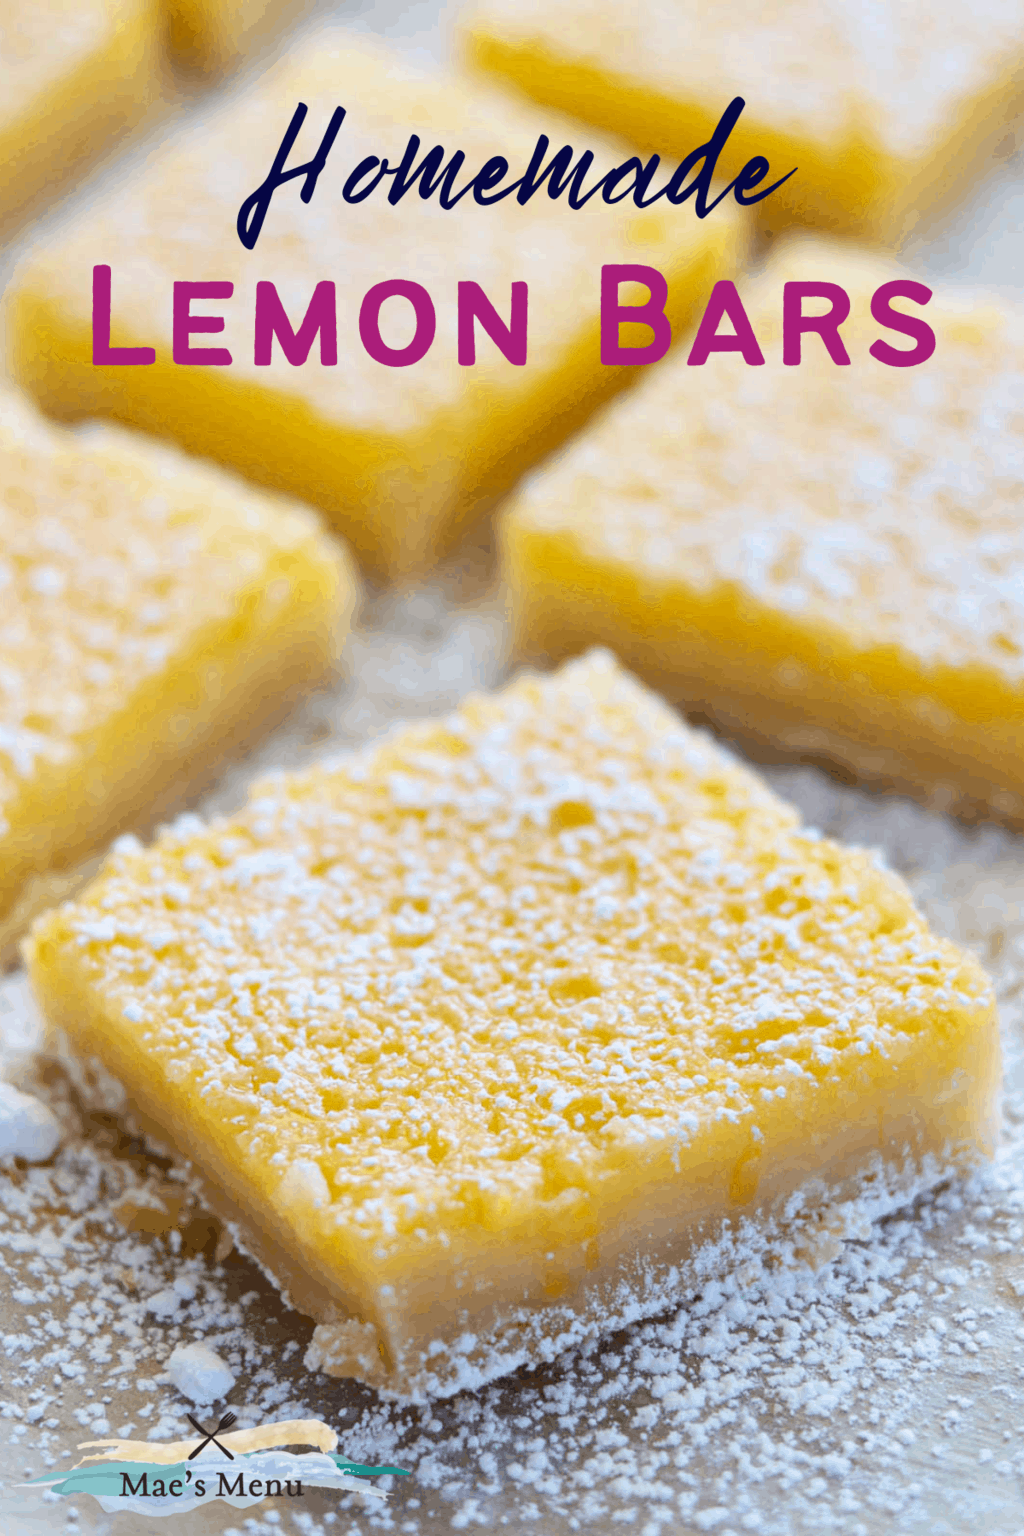
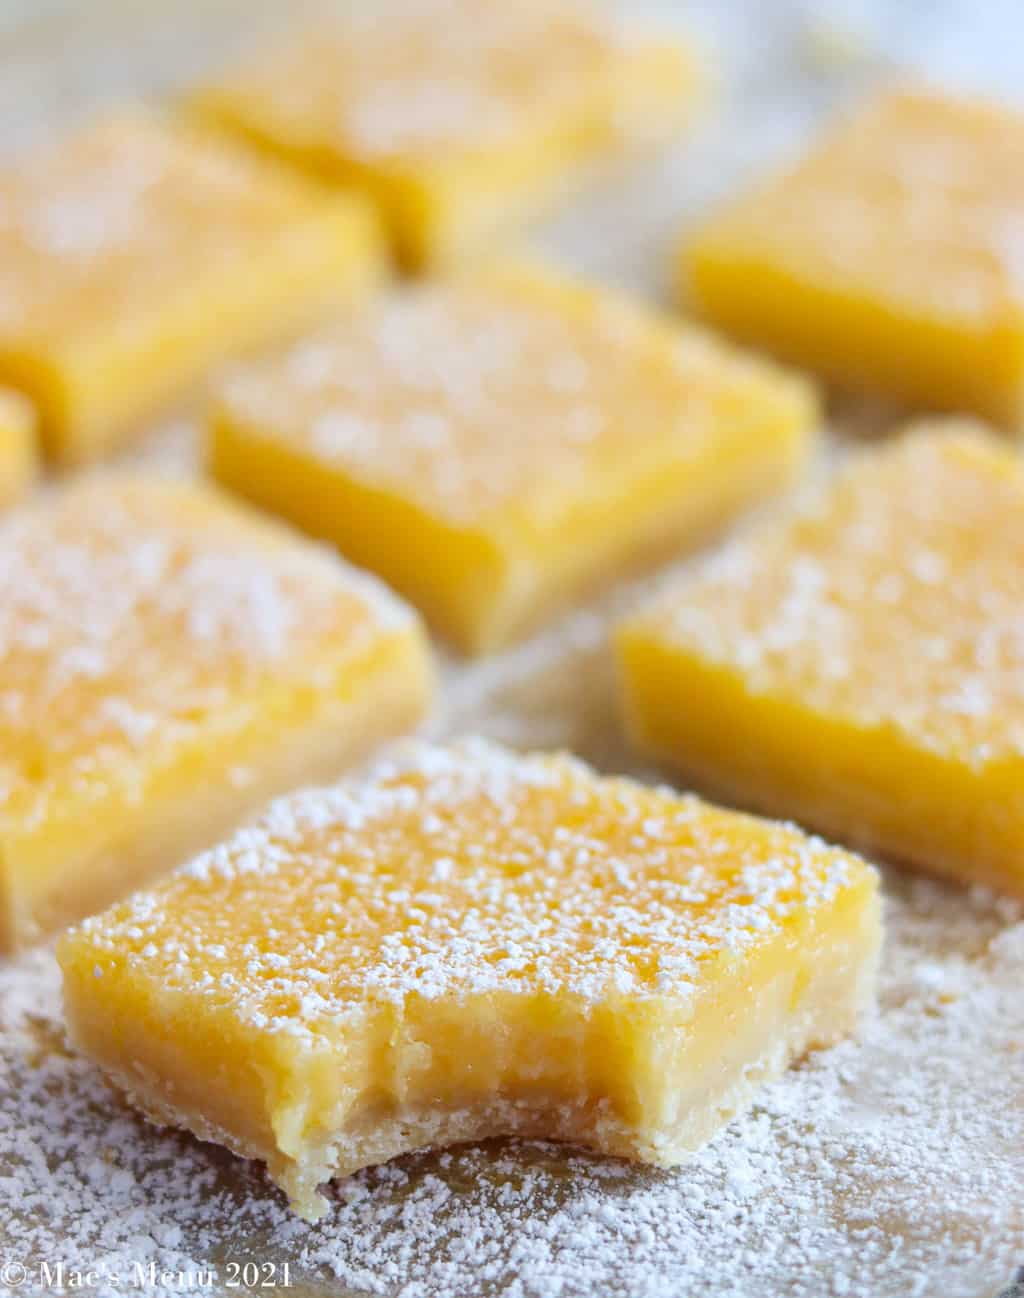
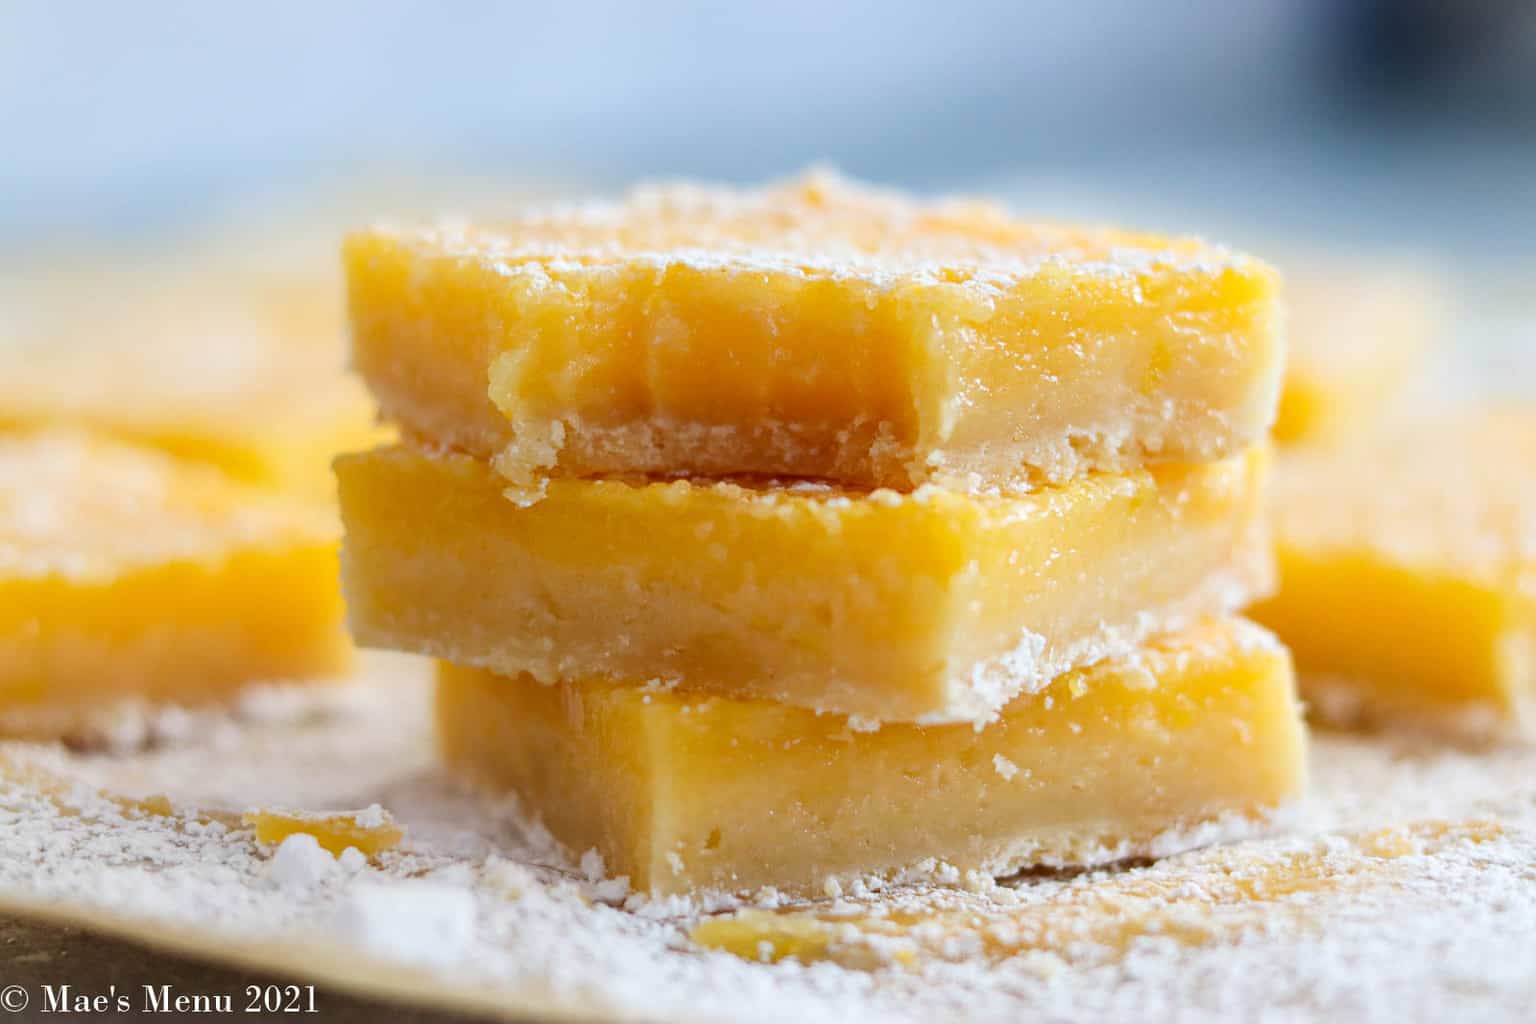
- Slice the bars and sprinkle with powdered sugar to garnish. Serve cool!

Recipe pro-tips:
- Use softened butter - ultra-soft butter (but not melted) is best for this recipe. I like to leave mine out in the sun until the butter is softened to a smooth and spreadable consistency.
- Fresh lemon juice is the best - you can't beat the bright and tart flavor of fresh lemons. Use fresh lemon juice, or the juice of about 3 lemons, for this recipe.
- Sprinkle the finished bars with confectioner's sugar - this adds an extra sweetness to balance out the acid but also covers up any of the air bubbles that may rise to the top when baking.
- Use a ceramic or glass plan - the baking is more even and you don't have to worry about any metal interacting with the acid from the lemon juice.
- Line the baking dish with parchment paper - this will help the bars easily release from the pan.
- Cool the bars completely before enjoying - the flavor and texture of these bars is the best when totally cooled. Let them come to room temperature immediately after baking and then pop them in the refrigerator to cool them off entirely.
How to tell when lemon bars are done:
You can tell that the lemon bars are done when the filling firms up and just barely jiggles when you nudge the pan with a potholder.
Can you double the recipe?
Yes, you can easily double this recipe. Just multiply all of the ingredients by 2 and follow the directions as listed, adding 3-5 minutes onto each of the baking steps.

Serving suggestions:
Serve these easy lemon bars anytime you're craving or the situation calls for a light and cooling dessert, like:
- Baby showers
- Mother's day
- Bridal showers
- Potlucks
- Easter
- Summer cookouts
- Pool parties
- ... and more!
A serving note:
These bars are best served cold or just at room temperature. This keeps the filling firm and I even think the flavor tastes more lemony and bright when served cool.
That being said, these bars don't do well sitting in heat or at room temperature for long periods of time. If serving these bars at a warm or outdoor event like a cookout or potluck, I recommend bringing them out right before serving and returning to the refrigerator shortly after
Can you make this lemon bar recipe ahead of time?
You certainly can make this recipe ahead of time. For best flavor and texture, make the bars up to 24 hours ahead of time.
Refrigerate the bars uncovered until they are entirely cooled. Then cover with an airtight cover until serving.
How to cut lemon bars:
The best and cleanest way to cut these bars is to use a clear and sharp knife. I love using my chef knife. Wipe the knife between uses with a warm cloth if the filling sticks to the knife.
How to store the bars:
- Refrigeration: store fully cooled bars covered in the fridge for up to 4 days. They are best consumed within the first day of making them but are still safe to eat and tasty until day 4.
- Freezing: freeze leftover bars with pieces of parchment paper separating the individual squares in a freezer-safe container for up to 3 months.
- Defrosting: defrost individual squares in the refrigerator for up to 2 hours, or until no longer frozen.
Tools needed to make this recipe:
- Food processor
- Large glass mixing bowl
- Measuring cups & spoons
- Lemon juice press
- Microplane zester
- Whisk
- 8 x 8 baking dish - glass or ceramic
- Parchment paper
More dessert recipes:
- Blueberry Lemon Bread
- Strawberry Lemonade Bars
- Lemon Sugar Cookies
- Meyer Lemon Curd
- Vegan Coffee Cake
- Blueberry Peach Crumble
- Gluten-Free Peach Cobbler
- Gluten-Free Zucchini Bread
- Whole Wheat Chocolate Chip Cookies
If you made and liked this recipe, don't forget to rate the recipe and let me know how it went for you in the comments! It always makes my day to hear from you!
Homemade Lemon Bars
Email FacebookSweet and tangy with a buttery shortbread crust, these Homemade Lemon Bars are a perfect classic dessert.
See the notes below this recipe for how to make the bars with a stand mixer or hand mixer.Ingredients
Shortbread crust:
- 1 cup + 2 tablespoons 140 g all-purpose flour
- ¼ teaspoon salt
- ⅓ cup granulated sugar
- ½ cup unsalted butter cut into ½-inch cubes; at room temperature
Lemon filling:
- ¾ cup granulated sugar
- 3 tablespoons cornstarch
- ½ cup lemon juice
- 3 large eggs
- Zest of 1 large lemon or about 2-3 teaspoons lemon zest
- Extra powdered sugar to garnish
Instructions
- Heat the oven to 350 degrees Fahrenheit. Line an 8 x 8-inch baking pan with parchment paper, criss-crossing two sheets of parchment paper to make it easier to pull the bars out to slice after baking.
- Make the crust: add the 1 cup + 2 tablespoons flour, ¼ teaspoon salt, and ⅓ cup granulated sugar to the bowl of a food processor. Pulse a few times to blend.
- With the food processor running, drop the cubes of butter one by one into the flour mixture. Run the processor until the dough sticks together and forms a large mass.
- Turn the dough out into the baking pan. Gently press down with your fingers or a spatula to evenly spread it into the pan.
- Bake the crust for 23-25 minutes, or until the crust just starts to turn golden brown around the edges. Remove the crust from the oven and reduce the oven temperature to 325 degrees Fahrenheit.
- Make the filling: in a large mixing bowl, whisk together the remaining ¾ cup granulated sugar, 3 tablespoons cornstarch, ½ cup lemon juice, 3 large eggs, and lemon zest until combined.
- Pour the filling into the still-warm crust. Bake for 19-22 minutes, or until the filling has thickened and just barely jiggles when you nudge the pan with a potholder.
- Remove the bars from the oven. Cool on a wire rack at room temperature until it reaches room temperature, or for about an hour. Move to the refrigerator and let chill for up to 2 hours, or until the bars are cool and firm. Slice the bars, sprinkle with powdered sugar (if desired) and enjoy cool!
Notes
- Use fresh lemon juice for the best flavor
- Glass or ceramic baking dishes are best for this recipe
- For best flavor and texture, cool the bars completely before enjoying
- Use softened butter - the softer the butter the better for this recipe. I like to leave mine out in the sun until the butter is to a very spreadable consistency.

Please share your recipe comments and feedback. It helps us create better content and helps other readers find what they're looking for.