Saucy lemon-kissed strawberries, a tender, sweet biscuit topping, and golden edges — this strawberry cobbler is everything a summer dessert should be.


This post may contain affiliate links. As an Amazon Associate, I earn from qualifying purchases. Please see my disclosure policy for details.
For more summer cobbler and crisp recipes, check out my Cast Iron Peach Cobbler, Raspberry Cobbler, and Gluten-Free Blackberry Cobbler.
Table of contents
Strawberry season peaks from May through June, and this strawberry cobbler is exactly what those berries are made for. It's the kind of old fashioned strawberry cobbler that feels like summer in a pan — saucy, a little jammy, golden on top, and absolutely impossible to stop eating. I make it every year when the strawberries finally look deep red and juicy — just the way they're supposed to.
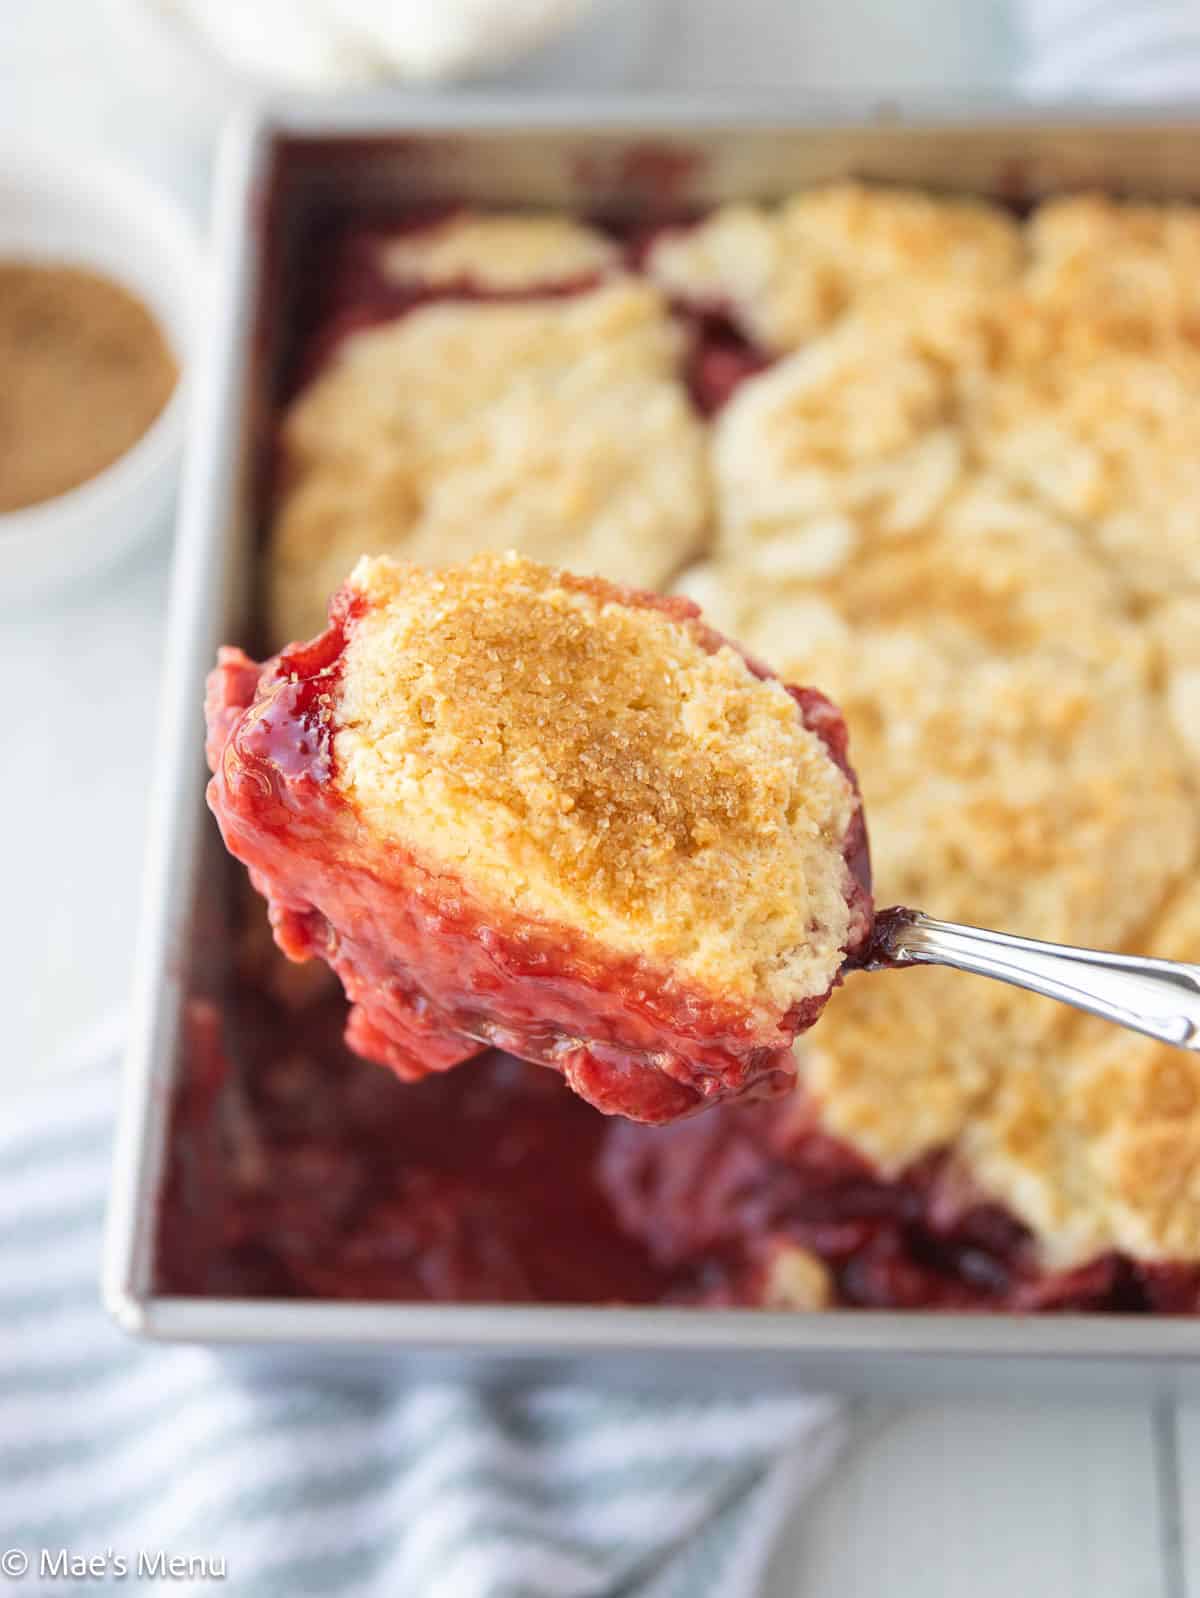
This easy strawberry cobbler is everything a summer dessert should be — impossibly saucy, bursting with fresh lemon-kissed strawberries, and topped with the most tender sweet biscuits you've ever tasted.
Unlike dry, cakey cobblers, this one has a gorgeous jammy strawberry filling that pools around each biscuit as it bakes. One 8x8 pan, simple ingredients, and ready in just over an hour. Make it for your next get-together, and prepare for recipe requests after!
For more fresh strawberry recipes: Strawberry Lemonade Bars, Strawberry Brownies, and Strawberry Shortbread Cookies.

What Is Strawberry Cobbler?
Strawberry cobbler is a baked dessert with a fresh fruit filling and a biscuit or cake-like topping spooned or dropped over the top before baking. As it cooks, the topping puffs up and turns golden while the fruit beneath gets jammy and saucy.
This fresh strawberry cobbler uses a sweet biscuit topping (not cake batter), giving it a tender, slightly flaky texture closer to shortcake than to a standard cobbler. The lemon zest in the filling is the secret weapon: it brightens the berries and adds subtle complexity, taking the whole thing from good to genuinely memorable.
Fresh vs. Frozen Strawberries
Fresh strawberries are the best choice for this cobbler recipe — they hold their shape better during baking and release just enough natural juice to create that perfectly saucy filling without getting watery. Though in many parts of the country you can find decent berries year-round, the sweetest and juiciest berries are usually found during their peak season, May-June.
If fresh strawberries aren't available, frozen work in a pinch. They release significantly more liquid as they thaw and bake, so expect a slightly saucier, looser filling. You can add an extra ½ teaspoon of cornstarch to help compensate. And don't thaw the berries before using.
How to pick the best strawberries: Look for bright red berries with no white spots — the redder all the way through, the sweeter and juicier. Riper berries mean more natural sweetness and a more flavorful filling.

The Biscuit Topping
Most strawberry cobbler recipes use a poured cake-like batter. This one uses a sweet biscuit dough dropped in dollops over the filling — and that distinction matters.
|
Biscuit vs. Cake Topping |
A cake batter bakes into a uniform, spongy layer. A biscuit topping creates individual golden mounds with crispy edges and a tender, slightly flaky interior — a touch more like strawberry shortcake than a typical cobbler, and the reason this recipe is so good. |
|
The Technique |
Don't overwork the biscuit dough. Mix just until a few streaks of flour remain — it will look slightly undermixed, and that's exactly right. Overworking the gluten makes the biscuits tough and dense instead of tender and flaky. |
|
Can You Use Store-Bought Biscuit Dough? |
Technically, yes (just pop a tube of refrigerated biscuit dough and place pieces over the strawberry filling and bake as directed), though the topping won't be as sweet and buttery. I always recommend homemade when possible! |
|
Using Bisquick |
Substitute 1¾ cups of Bisquick for the flour, baking powder, and salt. Add ⅓ cup granulated sugar and cut the butter in as directed. |
Important Ingredients & Substitutions

Here's what you'll need to grab for this easy strawberry cobbler:
Strawberries — 2 pints (about 2 lbs), hulled and sliced. Fresh is best. Riper, sweeter berries = more flavor and juice.
Cornstarch — Thickens the strawberry juices into a jammy, saucy filling rather than a watery puddle. Don't skip it.
Fresh lemon zest — The secret ingredient. Just 1 teaspoon brightens the berries and adds complexity without making it taste lemony. Use a microplane for the finest zest.
Buttermilk — Keeps the biscuit topping tender and adds a subtle tang. No buttermilk? Make your own: add 1 tablespoon of white vinegar or lemon juice to ¾ cup of milk, stir, and let sit 5 minutes.
Extra cold butter — Cold butter is essential for a flaky biscuit texture. Cut it into small cubes and refrigerate until the moment you add it to the flour. Warm butter melts into the dough instead of creating pockets of flakiness.
Coarse sugar — Sprinkled on top before baking for a sparkly, slightly crunchy finish. Regular sugar works, but coarse or sanding sugar is worth seeking out for the best finish.
Recipe Variations
- Mixed Berry Cobbler — Replace half the strawberries with blueberries, raspberries, or blackberries for a more complex berry filling.
- Strawberry Rhubarb — Use 1½ lbs strawberries and ½ lb rhubarb (sliced). Add an extra 2 tablespoons of sugar to balance the tartness.
- Strawberry Peach — Swap 1 pint of strawberries for 2 sliced peaches in peak summer. A beautiful combination.
- Dairy-Free — Use vegan butter and non-dairy buttermilk (oat milk + 1 tablespoon lemon juice works well).
- Gluten-Free — Substitute a 1:1 GF flour blend for the all-purpose flour and add an extra 1 tablespoon of buttermilk. Let the batter rest 5 minutes before spooning over the filling, and cool entirely before serving.
How to Make Strawberry Cobbler
For the complete recipe and measurements, scroll to the recipe card at the bottom of this post.
Prepare: Preheat the oven to 350°F. Spray or grease an 8x8-inch baking dish with nonstick cooking spray or butter.

Step 1: Add the strawberries, ¼ cup sugar, cornstarch, vanilla extract, and lemon zest to a large mixing bowl. Toss gently until combined.

Step 2: Pour the strawberry mixture into the prepared baking dish and spread evenly.

Step 3: In a medium bowl, whisk together the flour, remaining ½ cup sugar, salt, and baking powder until combined.

Step 4: Add the cold butter to the flour mixture. Cut in with a fork or pastry cutter until the butter is broken into small pebble-sized pieces.

Step 5: Slowly add the buttermilk, stirring until just a few streaks of flour remain. Do not overmix.

Step 6: Spoon the batter in large dollops over the strawberry filling and sprinkle evenly with the coarse sugar.

Step 7: Bake 50–60 minutes until the biscuits are golden brown and the cobbler bubbles around the edges.
Chelsea's Recipe Pro-Tips

- Don't overmix the biscuit dough — Stop stirring the moment there are just a few streaks of flour remaining. It looks undermixed — that's intentional. Overmixing develops gluten and makes the biscuits tough.
- Use the ripest strawberries you can find — This is a peak season recipe. The riper the berries, the more juice they release and the more flavorful the filling. If your strawberries are on the pale or underripe side, add an extra tablespoon or two of sugar.
- Let it cool before serving — The filling is molten right out of the oven and needs 15–30 minutes to set up into that saucy, jammy consistency. Serving it too early means a runny filling.
- Don't skip the coarse sugar on top — It adds a sparkly, slightly crunchy finish that contrasts beautifully with the soft biscuit beneath. It's totally worth having in your pantry.

How to Make Whipped Cream
Homemade whipped cream takes 3 minutes and is worth every second. Beat 1 cup of heavy whipping cream with 1–2 tablespoons of powdered sugar and ½ teaspoon of vanilla extract using a hand mixer until soft peaks form. Use immediately or refrigerate for up to 24 hours.
Storage Directions
- Refrigerating: Store covered in an airtight container for 3–5 days. The biscuit topping will soften as it sits — still delicious, just less crispy.
- Freezing: Cool completely to room temperature before transferring to a freezer-safe container. Freeze up to 3 months. Thaw overnight in the refrigerator. The strawberry filling texture may change but it will still be delicious.
- Reheating: Microwave individual portions in 30-second intervals until warmed through. For crispier biscuits, reheat in the oven at 350°F for 10–15 minutes uncovered.
- Make-ahead: Assemble the strawberry filling up to 24 hours ahead and refrigerate. Make the biscuit dough fresh and spoon over right before baking for the best texture.

Serving Suggestions
Strawberry cobbler is best served warm, straight from the pan with a generous scoop of vanilla ice cream or a cloud of whipped cream on top. It also works with a dollop of Greek yogurt for a slightly lighter, tangier finish. Leftovers cold from the fridge the next morning are not officially a breakfast, but nobody's stopping you.
Strawberry Cobbler FAQs
A cobbler has a biscuit or cake-like topping dropped over the fruit filling. A crisp has an oat and butter crumble topping. A cobbler is softer and more biscuity; a crisp is crunchier and more granola-like. Both are delicious — they're just different textures.
Usually caused by underbaking or too much liquid from the fruit. Bake until the biscuits are golden brown and the filling is visibly bubbling around the edges — not just in the center. The cornstarch needs to reach full temperature to properly thicken the filling.
Yes — make the strawberry filling up to 24 hours ahead and refrigerate. Mix the biscuit dough fresh and spoon over right before baking. Fully baked cobbler keeps 3–5 days in the fridge.
Yes — substitute a 1:1 GF flour blend for the all-purpose flour and add an extra tablespoon of buttermilk. Let the batter rest 5 minutes before spooning over the filling.
The biscuits should be deep golden brown on top and the strawberry filling should be actively bubbling around the edges of the dish. Insert a toothpick into the center of a biscuit — it should come out clean.
Yes — blueberries, raspberries, blackberries, or a mix all work well in this recipe. Tart berries may need an extra tablespoon or two of sugar.
Yes — no adjustments are needed. This recipe was developed and tested in Fort Collins, CO at approximately 5,000 feet, so it's already high altitude-friendly as written.
Save this Recipe for Later on Pinterest

More Summer Desserts


If you liked and made this Strawberry Cobbler Recipe, don't forget to rate it and let me know how you liked it in the comments. I always love hearing from you!
Recipe Card
Strawberry Cobbler
Ingredients
Strawberry Filling
- 2 pts (2 lbs) strawberries hulled and sliced
- ¼ cup granulated sugar
- 1 tablespoon cornstarch
- 1 teaspoon pure vanilla extract
- 1 teaspoon fresh lemon zest
Biscuit Topping
- 1 ¾ cup (210g) all-purpose flour
- ½ cup granulated sugar
- ¼ teaspoon salt
- 1 ½ teaspoons baking powder
- ¼ cup extra cold unsalted butter cut into small cubes
- ¾ cup extra cold buttermilk
- 2 tablespoons coarse or sanding sugar
To Serve
- Whipped cream or vanilla ice cream
Instructions
- Preheat the oven to 350°F. Spray or grease an 8x8-inch baking dish with nonstick cooking spray or butter.
- In a large bowl, toss together the strawberries, ¼ cup sugar, cornstarch, vanilla extract, and lemon zest until combined. Pour into the prepared baking dish.
- In a medium bowl, whisk together the flour, ½ cup sugar, salt, and baking powder.
- Add the cold butter and cut in with a fork or pastry cutter until the butter is broken into small pebble-sized pieces.
- Slowly stir in the buttermilk until just a few streaks of flour remain. Do not overmix.
- Spoon the batter in large dollops over the strawberry filling. Sprinkle evenly with the coarse sugar.
- Bake 50–60 minutes until the biscuits are golden brown and the filling is bubbling around the edges.
- Cool at room temperature 15–30 minutes before serving. Serve warm with whipped cream or vanilla ice cream.
Notes
- Don't overmix the biscuit dough — Stop stirring the moment a few streaks of flour remain. It looks undermixed — that's correct. Overmixing makes tough, dense biscuits.
- Cold butter is essential — keep it refrigerated until the moment you add it.
- No buttermilk? Add 1 tablespoon of white vinegar or lemon juice to ¾ cup of milk. Let sit 5 minutes.
- Frozen strawberries: Add an extra ½ teaspoon of cornstarch and use from frozen — don't thaw.
- Gluten-free: Use a 1:1 GF flour blend and add 1 extra tablespoon of buttermilk.
- Storage: Refrigerate 3–5 days. Freeze up to 3 months — cool completely before freezing.
- High altitude (5,000+ ft): No adjustments are needed to make this recipe at high altitude.
- Cool before serving — Let the cobbler rest at room temperature for 15–30 minutes after baking. The filling is molten straight from the oven and needs time to set up into that jammy, saucy consistency.
- Bisquick swap — Substitute 1¾ cups of Bisquick for the flour, baking powder, and salt. Add ⅓ cup granulated sugar and cut the butter in as directed. Add the buttermilk and proceed with the recipe.
