No Jello, no fuss — this pineapple poke cake is moist, tropical, and topped with coconut whipped cream. The only summer potluck dessert you need.


This post may contain affiliate links. As an Amazon Associate, I earn from qualifying purchases. Please see my disclosure policy for details.
For more summer dessert recipes, check out my Lemon Poke Cake, Peach Bread Pudding, and Blueberry Coffee Cake.
Table of Contents
- What Is a Poke Cake?
- The Coconut Whipped Cream
- Pineapple Glaze Guide
- Pineapple Guide: Fresh vs. Canned
- Important Ingredients and Substitutions
- Recipe Variations
- Make-Ahead and Storage Directions
- Serving Suggestions
- Pineapple Poke Cake FAQs
- Save this Recipe for Later on Pinterest
- More Summer Desserts
- Recipe Card
Every summer, there's one dessert I get asked to bring to every cookout, every potluck, every backyard gathering — and it's this pineapple poke cake. It's the kind of recipe that sounds simple (because it is) but tastes like you spent way more effort than you did. The whole thing comes together with pantry staples and a box of cake mix, but nobody would ever guess that from the first bite.
Unlike most pineapple poke cake recipes, this one skips the Jello entirely. A fresh pineapple syrup soaks into every hole you poke in the hot cake, creating a brighter, more natural tropical flavor that tastes like actual pineapple — not artificial fruit punch. Topped with coconut whipped cream and toasted coconut flakes, it's the kind of dessert that disappears before you set the serving spoon down.
It feeds 12, travels beautifully, and is best made the day before — which means less stress on the day of the party.
For more crowd-friendly summer desserts: Plum Crisp, Strawberry Lemonade Bars, and Cast Iron Peach Cobbler.
What Is a Poke Cake?
A poke cake is exactly what it sounds like: a baked cake with holes poked throughout, then covered with a liquid that soaks in and keeps every bite incredibly moist and flavorful.
In this case, fresh pineapple syrup does the work — seeping into the warm cake and infusing it with bright, concentrated pineapple flavor throughout. The result is a cake that stays moist for days and tastes better the longer it sits.
Why No Jello?
Most poke cake recipes use Jello as the "poke" glaze. It works, but the flavor and color are artificial, and you're adding a packet of dyed gelatin to an otherwise simple dessert. This recipe skips all of that in favor of a homemade pineapple syrup made from pineapple juice, sugar, and a tablespoon of butter — and the difference is noticeable. The pineapple flavor is brighter, more natural, and much more like actual fruit.
Can you add Jello if you prefer the classic version? Yes — swap the pineapple syrup for a packet of pineapple Jello prepared according to package instructions. But once you try the syrup version, it's hard to go back.

The Coconut Whipped Cream
This is what elevates the pineapple poke cake from good to lick-the-plate great. It's not just whipped cream — it's coconut whipped cream, made by folding sweetened flaked coconut into freshly whipped heavy cream. The result is light, creamy, and subtly tropical, complementing the pineapple perfectly without being overpowering.
Why it's better than Cool Whip: Cool Whip works in a pinch and is a perfectly valid shortcut — but it's stabilized and slightly artificial-tasting. The homemade version takes about 3 minutes to make and tastes dramatically better.
Can you substitute Cool Whip? Yes — fold the sweetened coconut into 2 cups of Cool Whip. It won't be quite as light or fresh-tasting, but it still works and is great for make-ahead situations since it stays stable longer in the fridge.
Tips for perfect coconut whipped cream:
- Use cold heavy cream straight from the refrigerator
- Chill your bowl and whisk attachment in the freezer for 10–15 minutes first if your kitchen is warm
- Whip to stiff peaks before folding in the coconut
- Fold the coconut in gently — don't overmix or you'll deflate the cream
Toasted coconut topping: For extra flavor and visual appeal, spread ½ cup of additional sweetened coconut on a baking sheet and toast at 350°F for 5–7 minutes, stirring once, until golden. Sprinkle on top of the finished cake. The toasty crunch against the creamy frosting adds a fantastic finish to the dessert.

Pineapple Glaze Guide
The pineapple syrup is simple to make, but a few details matter:
The Consistency: It should coat the back of a spoon and fall in a slow, thick stream when poured. If it's still watery and thin after 7 minutes, give it another minute or two. It will continue to thicken slightly as it cools.
Cooking Time: 5–7 minutes at a medium-high boil, stirring frequently. Watch it closely — it can go from perfect to burnt quickly once it thickens.
Pour it Hot: Spread the glaze over the cake immediately after it comes off the heat. The hot syrup soaks more deeply into the warm cake. If you let both cool first, the syrup won't penetrate as well, and you'll end up with surface-level flavor instead of pineapple in every bite.
Pineapple Guide: Fresh vs. Canned
Canned crushed pineapple (recommended): The most convenient option and what this recipe uses. It's consistent in sweetness and moisture content year-round. DO NOT drain it. The juice adds moisture to the cake batter and serves as the base for your pineapple syrup.
Fresh pineapple: Peaks in summer and adds a slightly brighter, more complex flavor. If using fresh, crush or finely chop it and measure out 20 oz (equivalent to one can). You'll need to juice fresh pineapple separately for the syrup.
Can you use pineapple juice instead of crushed pineapple in the batter? Technically, yes, but you'll lose the texture that the crushed fruit adds, and the moisture balance will be slightly off. The cake won't be quite as moist or flavorful — stick with crushed.
Important Ingredients and Substitutions

Yellow cake mix — The base. White cake mix works equally well. The extra flour, sugar, and sour cream added to the mix give it a bakery-style texture rather than a typical, lifeless boxed cake.
All-purpose flour — Ddding extra flour to boxed cake mix is the "doctored cake mix" technique — it tightens the crumb and significantly improves the structure. Weigh it (120g) for best results.
Sour cream — The secret to the ultra-tender, rich crumb.
Unsalted butter (melted) — Replaces the vegetable oil typically called for on the box. More flavor, better texture.
Sweetened flaked coconut — The kind in the baking aisle, not unsweetened. The sweetness is part of the balance with the tangy pineapple. If desired, toast extra for the topping.


Recipe Variations
- Tropical Pineapple Coconut Poke Cake — Use coconut cake mix instead of yellow cake mix and add ½ teaspoon coconut extract to the batter for a full tropical flavor bomb.
- Pineapple Upside Down Poke Cake — Arrange pineapple rings and maraschino cherries in the bottom of the greased pan before adding batter for a classic pineapple upside-down cake twist.
- Extra Coconut — Top the finished cake with toasted coconut flakes for a crunchy, golden finish that takes it over the top.
- No Coconut — Not a coconut fan? Skip the flaked coconut in the frosting entirely — just use sweetened whipped cream. Still delicious.
- Gluten-Free — Use a 1:1 gluten-free cake mix and substitute gluten-free all-purpose flour in equal measure.
How to Make Pineapple Poke Cake
For the complete recipe and measurements, scroll to the recipe card at the bottom of this post.

Step 1: Preheat the oven to 350°F. Grease a 9x13-inch cake pan with non-stick spray or butter, then dust with all-purpose flour.

Step 2: In a large mixing bowl, whisk together the cake mix, flour, sugar, salt, eggs, crushed pineapple (undrained), melted butter, milk, and sour cream until just combined.

Step 3: Pour the batter into the prepared pan. Bake for 43–48 minutes, until a toothpick inserted into the center comes out clean.

Step 4: While the cake finishes baking, make the pineapple syrup. Bring the pineapple juice and sugar to a boil over medium-high heat. Cook for 5–7 minutes, stirring frequently, until thick and syrupy. Remove from heat and whisk in the butter.
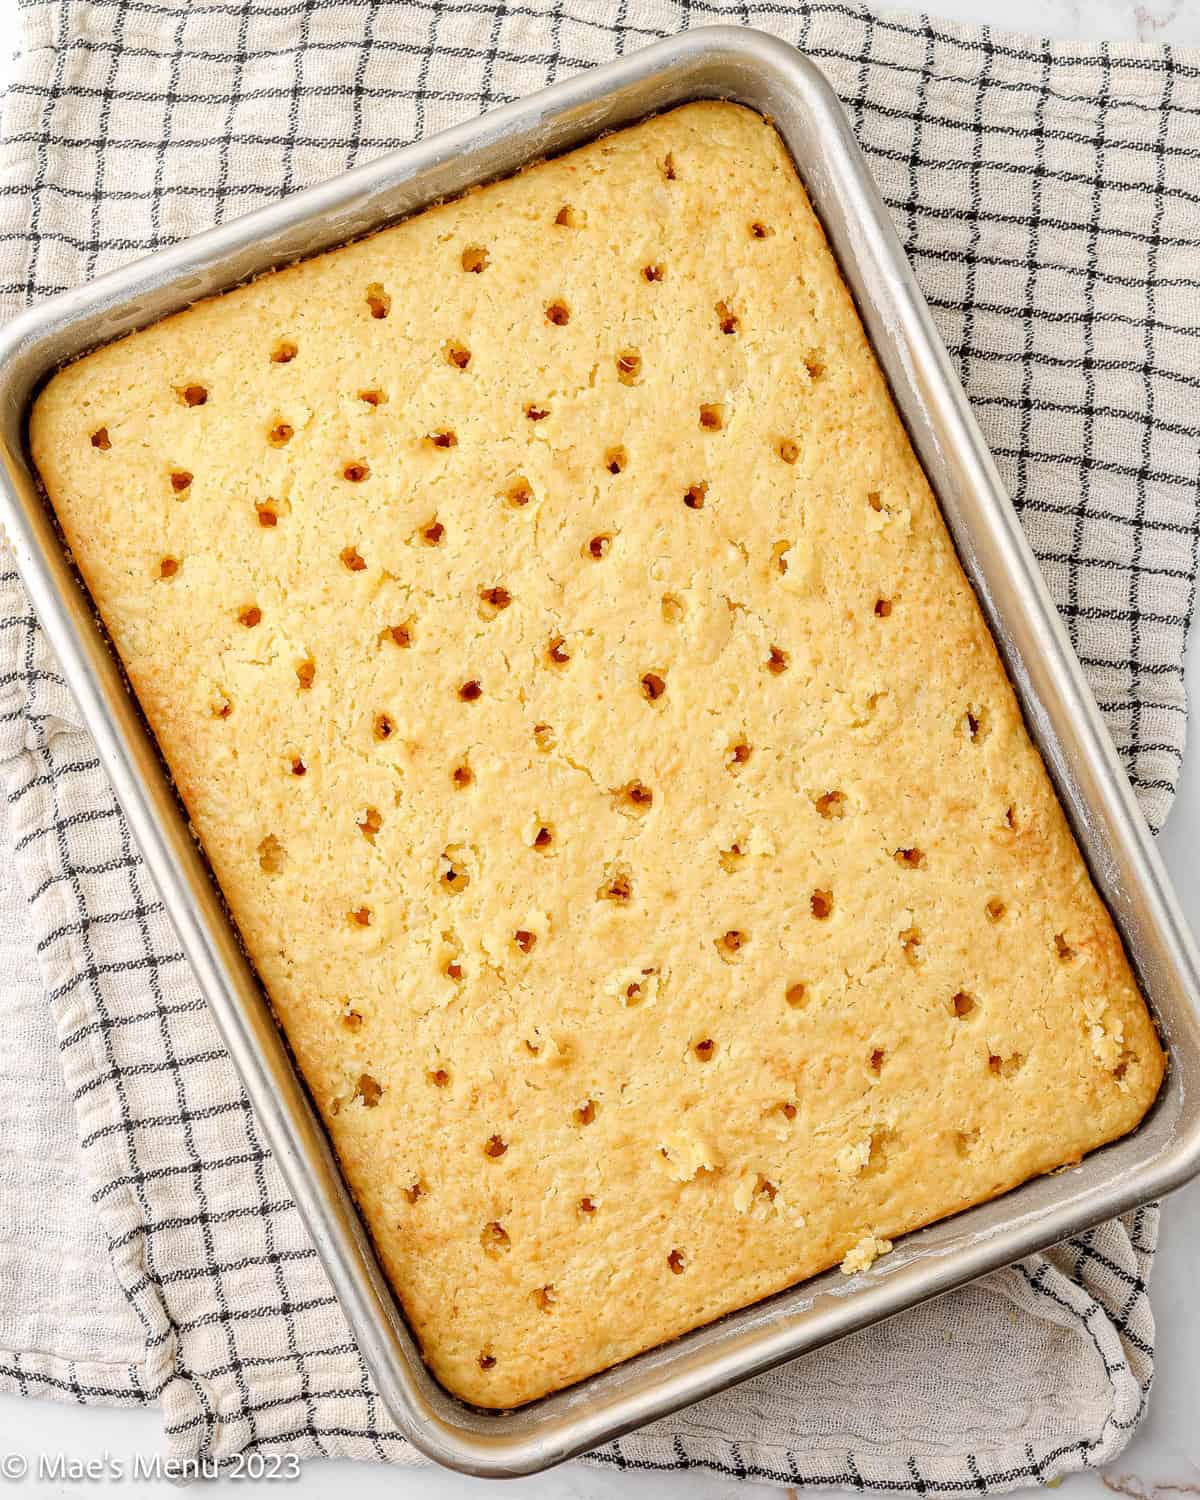
Step 5: While the cake is still piping hot, poke holes 1 inch apart all over the surface using a skewer, chopstick, or the handle of a wooden spoon.
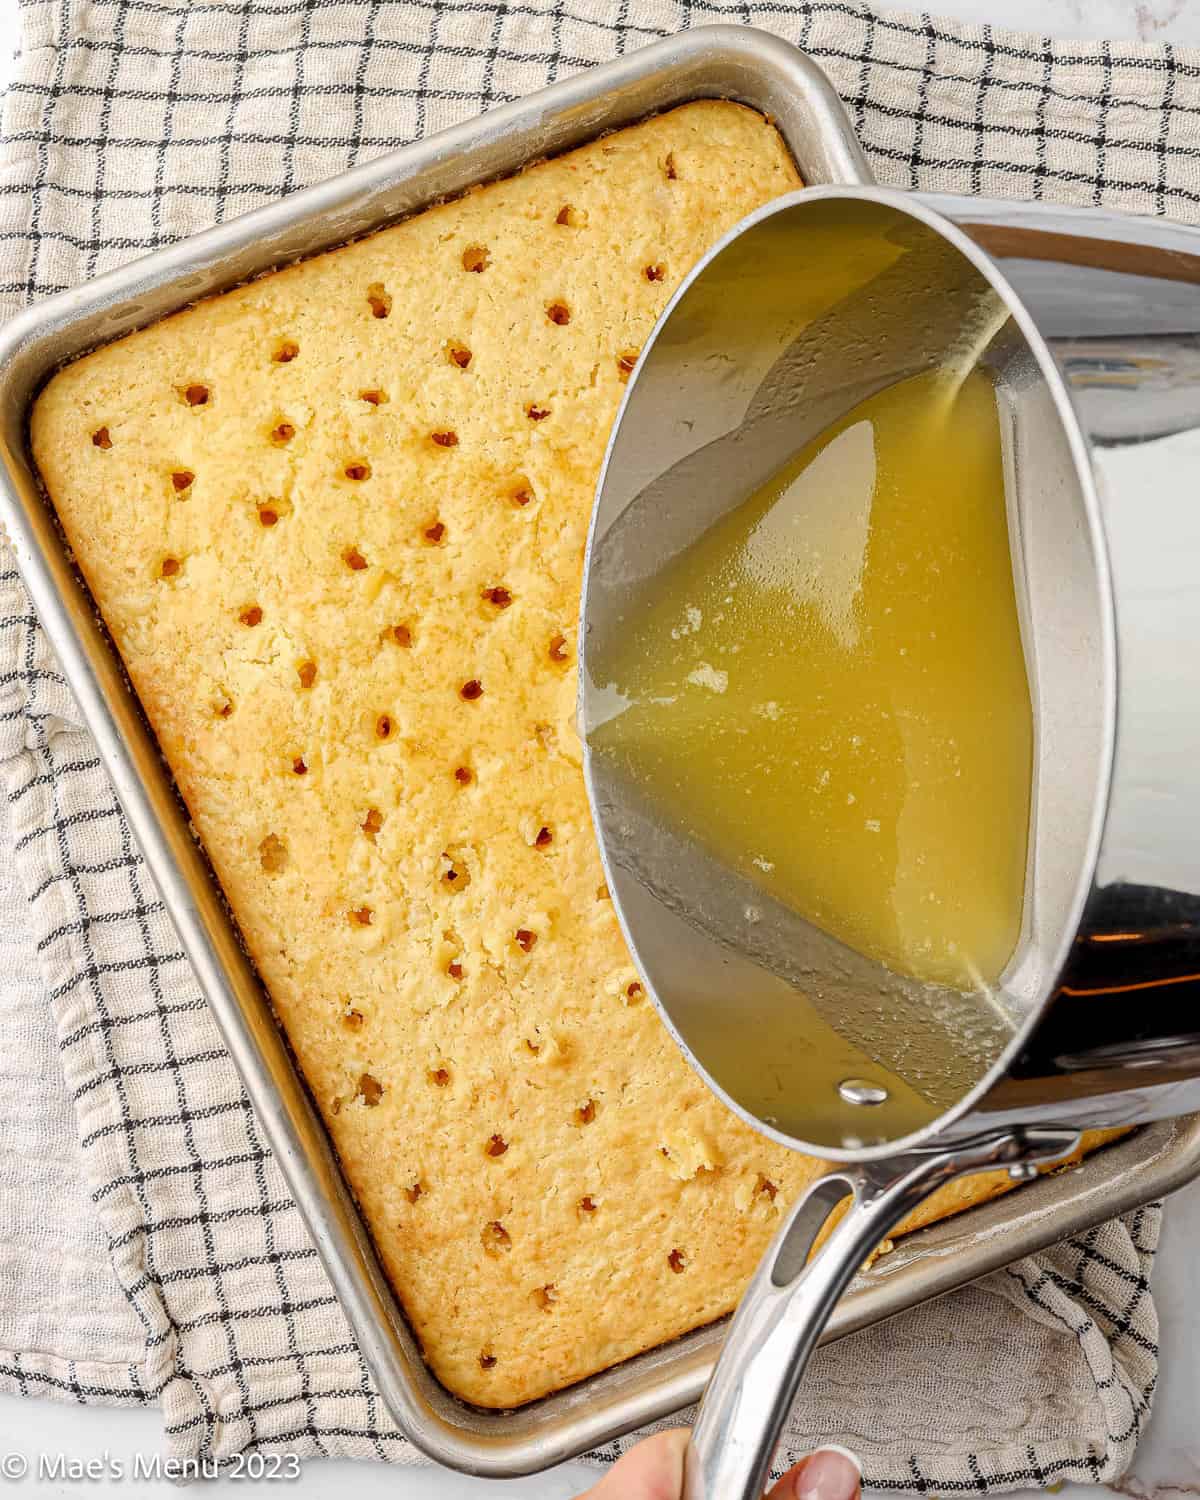
Step 6: Pour the hot pineapple syrup evenly over the hot cake. Let cool completely to room temperature, then refrigerate for at least 1 hour (overnight is better) or until cool.

Step 7: Make the coconut whipped cream: beat cold heavy cream, confectioner's sugar, and vanilla with a hand mixer or stand mixer until stiff peaks form. Fold in the sweetened coconut.

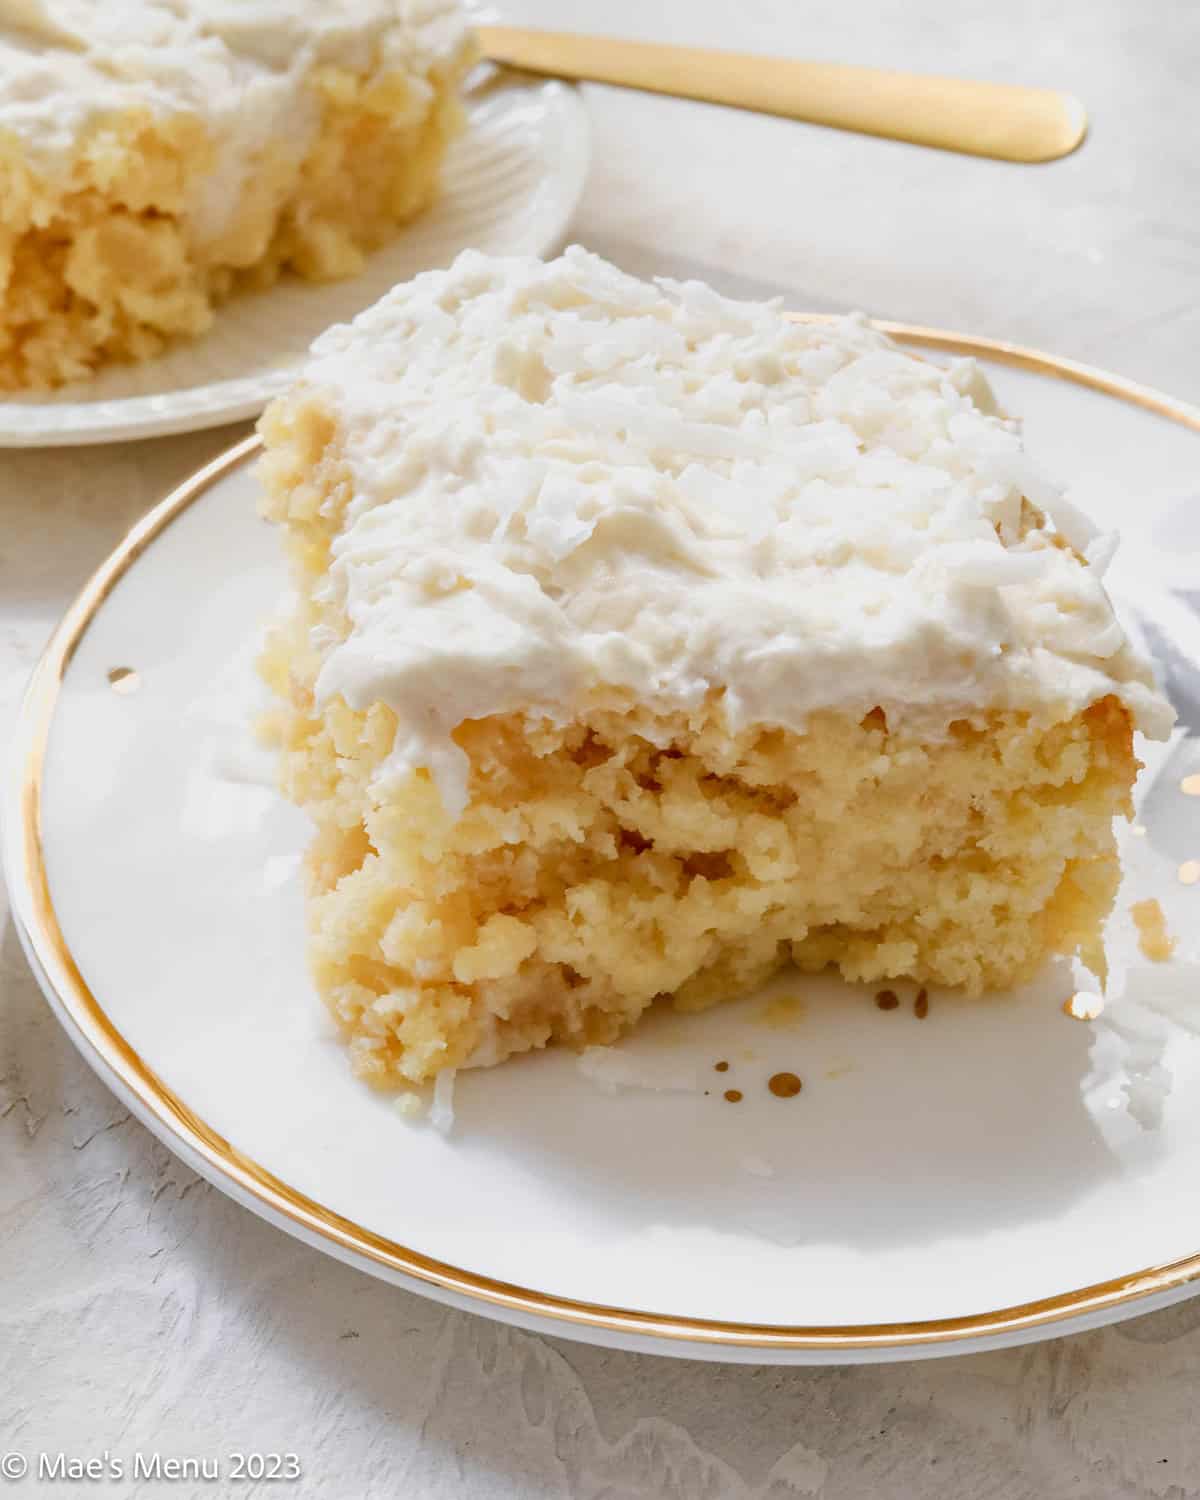
Step 8: Spread the coconut whipped cream over the cooled cake. Top with toasted coconut flakes if desired. Slice and serve cold.
Chelsea's Recipe Pro-Tips

- Measure flour by weight — 120g of flour is the sweet spot. Scoop-and-pack measuring can add 30% more flour than intended, which makes the cake dense and dry.
- Don't overmix the batter — stir until just combined and no streaks of flour remain. Overmixing develops gluten and makes the crumb tough instead of tender.
- Pour the syrup hot onto a hot cake — this is the most important step for maximum absorption. Hot syrup + hot cake = pineapple flavor in every single bite. Don't let either cool first.
- Make it a day ahead — Like many poke cakes, this one is better the next day. The syrup has more time to soak through, the crumb settles, and the coconut whipped cream firms up beautifully. It's one of the rare recipes that rewards patience.
- Chill the bowl for whipped cream — if your kitchen is warm, a chilled bowl makes a big difference in getting the cream to whip up properly. 10 minutes in the freezer does the trick.
Make-Ahead and Storage Directions
Make-ahead (recommended): This recipe is ideal for a potluck dessert because you can make it entirely the day before. Bake, soak with syrup, and refrigerate overnight. Add the whipped cream topping the morning of — or up to a few hours before serving. The flavor improves significantly after a night in the fridge.
Refrigerating: Store covered in the refrigerator for 3–4 days. The cake actually gets moister and more flavorful as it sits.
Freezing: The untopped cake (without whipped cream) can be frozen whole or in individual servings in a freezer-safe container for up to 3 months. Thaw individual slices in the fridge for 2 hours; the whole cake for 4–8 hours. Add fresh whipped cream after thawing — don't freeze with the topping.
Transport tips for potlucks: Keep the cake chilled until right before leaving. Bring the cake in the pan, covered tightly with plastic wrap. The topping holds up well for several hours at room temperature on a warm day, but the cake tastes best cold.

Serving Suggestions
This pineapple poke cake is a full-on crowd-pleaser on its own — bring it to Memorial Day cookouts, Fourth of July parties, baby showers, or any summer gathering and watch it disappear.
For a dessert table, pair it with Raspberry Cobbler so guests have a berry option alongside the tropical one — always a hit.
Pineapple Poke Cake FAQs
Yes — fold ½ cup of sweetened coconut into 2 cups of Cool Whip. It won't be quite as light or fresh-tasting as homemade, but it works well and stays stable longer in the fridge for make-ahead situations.
When refrigerated, it keeps for 3–4 days and actually becomes moister over time. The untopped cake freezes well for up to 3 months.
Yes — finely crush or chop 20 oz of fresh pineapple and use it in place of canned. You'll need to separately juice fresh pineapple for the syrup. Canned is more convenient and consistent, but fresh in peak summer is delicious.
Yes — use a 1:1 gluten-free yellow cake mix and substitute gluten-free all-purpose flour in the same quantity. The texture may vary slightly, but it works well.
This 9x13 cake serves 12 generously. For a larger crowd, double the recipe and bake in two pans.
Save this Recipe for Later on Pinterest

More Summer Desserts


If you liked and made this Pineapple Poke Cake Recipe, don't forget to rate it and let me know how you liked it in the comments. I always love hearing from you!
Recipe Card
Pineapple Poke Cake
Ingredients
Pineapple Cake:
- 1 16 oz. package yellow cake mix or white cake mix
- 1 cup (120g) all-purpose flour
- ⅔ cup granulated sugar
- ½ teaspoon salt
- 2 large eggs
- 1 20 oz can crushed pineapple
- ½ cup unsalted butter melted
- ¾ cup milk whole or 2% milk
- ¼ cup sour cream
- Additional flour for dusting the cake pan
Pineapple Syrup:
- 1 cup pineapple juice
- ½ cup granulated sugar
- 1 tablespoon unsalted butter
Coconut Whipped Cream:
- 1 cup heavy whipping cream cold
- ⅓ cup confectioner’s sugar
- ½ teaspoon pure vanilla extract
- ½ cup sweetened flaked coconut
- additional toasted coconut to garnish (optional)
Instructions
- Preheat oven to 350°F. Grease a 9x13-inch cake pan with non-stick spray or butter, then dust with flour.
- In a large bowl, whisk together cake mix, flour, sugar, salt, eggs, crushed pineapple (undrained), melted butter, milk, and sour cream until just combined.
- Pour batter into the prepared pan. Bake 43–48 minutes until a toothpick inserted in the center comes out clean.
- While the cake bakes, make the pineapple syrup: bring pineapple juice and sugar to a boil over medium-high heat. Cook 5–7 minutes, stirring frequently, until thick and syrupy. Remove from heat and whisk in butter.
- While the cake is still piping hot, poke holes 1 inch apart all over the surface with a skewer, chopstick, or wooden spoon handle.
- Pour hot pineapple syrup evenly over the hot cake. Cool completely, then refrigerate at least 1 hour (overnight is best).
- Make whipped cream: beat cold cream, confectioner's sugar, and vanilla until stiff peaks form. Fold in sweetened coconut.
- Spread coconut whipped cream over cooled cake. Top with toasted coconut if desired. Serve cold.
Notes
- Do NOT drain the crushed pineapple — the juice goes into the batter and the syrup.
- Best made 1 day ahead — the flavor improves significantly overnight.
- Cool Whip substitute: Fold ½ cup sweetened coconut into 2 cups Cool Whip.
- Toasted coconut topping: Spread coconut on a baking sheet and toast at 350°F for 5–7 minutes until golden.
- Gluten-free: Use a 1:1 GF cake mix and GF all-purpose flour.
- Storage: Refrigerate covered 3–4 days. Freeze untopped cake up to 3 months.
- Serves 12 — double the recipe for a larger crowd.

Delicious and easy! The cake is very moist. I sprinkled extra coconut over the top of the whipped cream frosting.
So glad to hear you loved it, Claire!