Low-carb, gluten-free, and only 266 calories per serving — this zucchini lasagna recipe delivers all the cheesy, meaty comfort of the classic with none of the noodles. And with 24 grams of protein per serving, it actually keeps you full.


This post may contain affiliate links. As an Amazon Associate, I earn from qualifying purchases. Please see my disclosure policy for details.
Table of Contents
- At A Glance: Zucchini Lasagna
- Why You'll Love This Zucchini Lasagna
- How to Remove Water from Zucchini
- Important Ingredients and Substitutions
- How to Slice Zucchini for Lasagna
- The Ricotta Layer
- Recipe Variations
- Serving Suggestions
- Zucchini Recipe FAQs
- Save this Recipe for Later on Pinterest
- More Zucchini Recipes
- Recipe Card
For more zucchini recipes, check out my Air Fryer Zucchini, Cheesy Zucchini Casserole, and Crispy Zucchini Fritters.
At A Glance: Zucchini Lasagna
- Prep Time: 25 minutes
- Cook Time: 50 minutes
- Cooling Time: 10 minutes
- Total Time: 1 hour 25 minutes
- Makes: 12 servings
- Nutrition (per serving): 266 calories | Protein: 24g | Fat: 14g | Carbs: 10g | Fiber: 3g
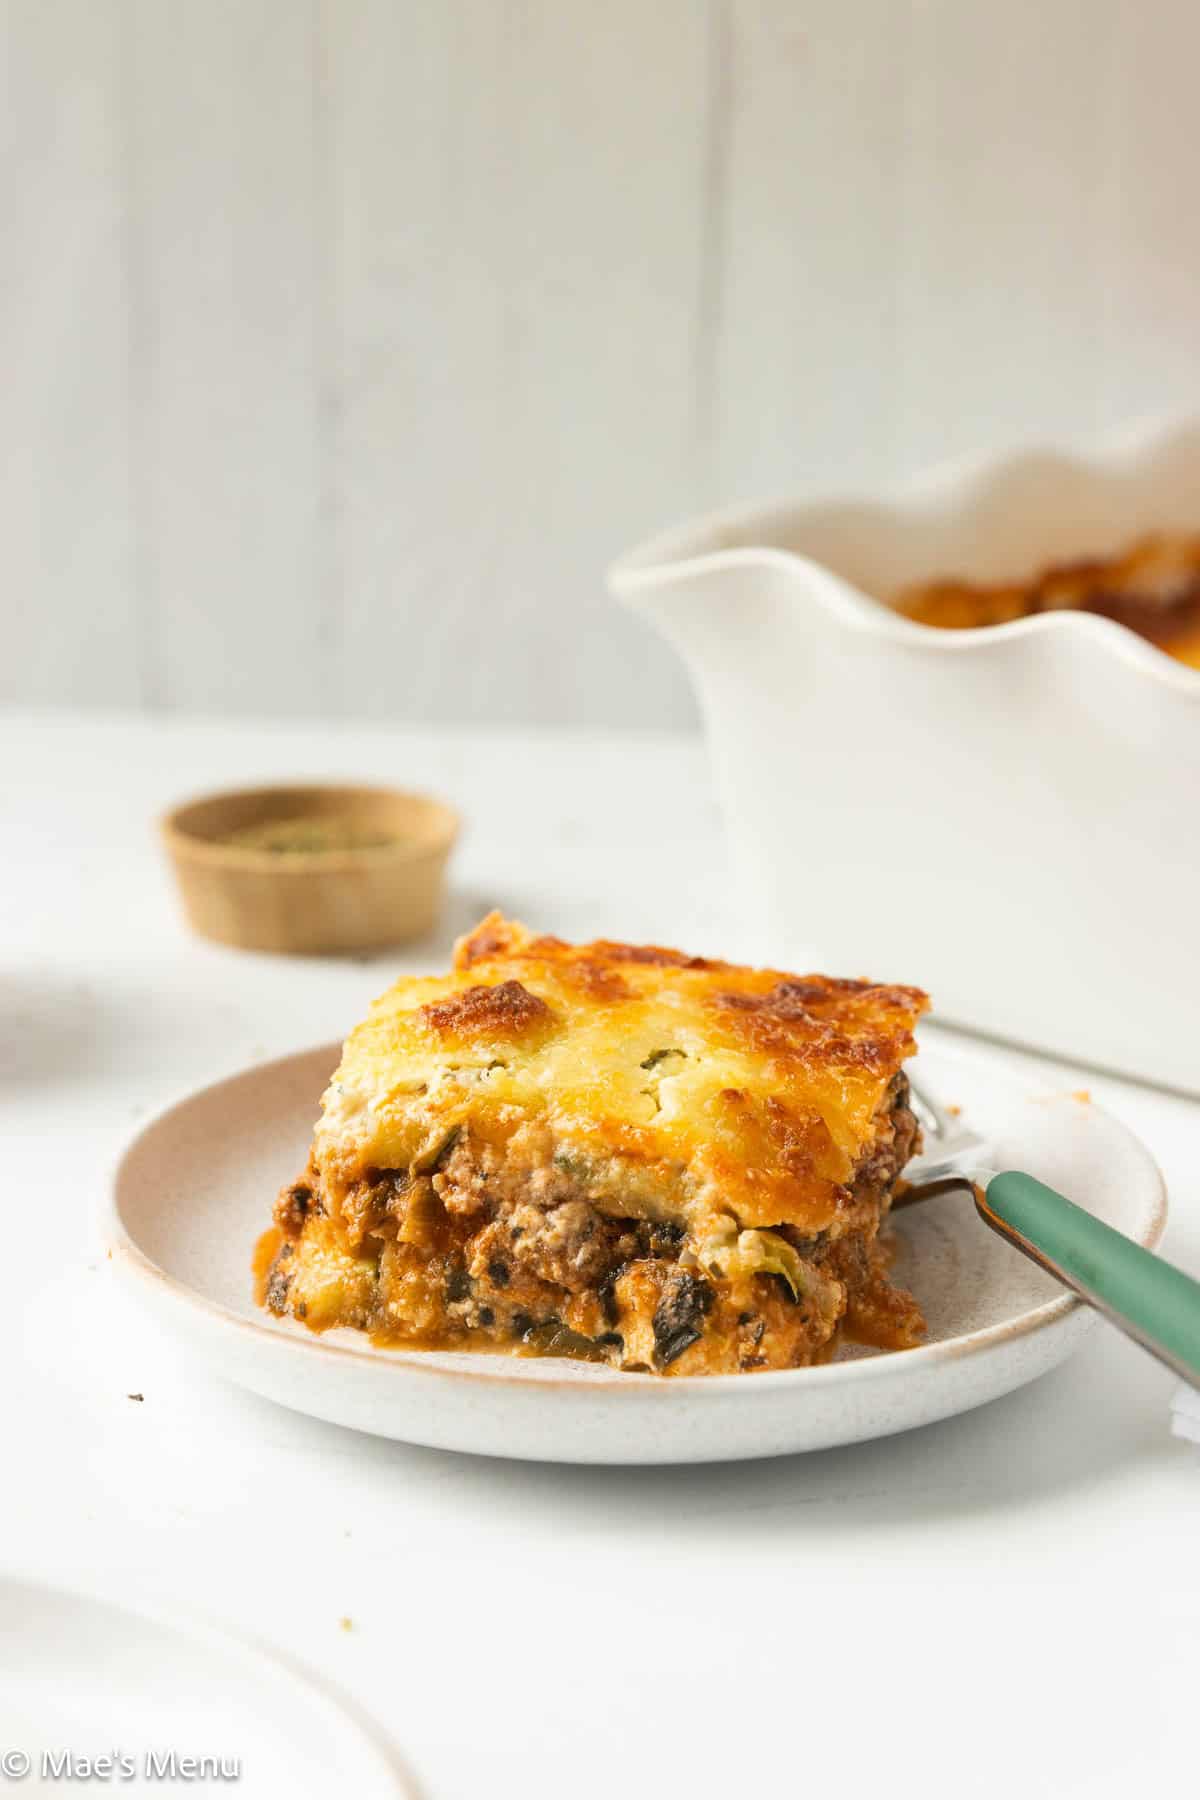
- What it Tastes Like: Cheesy, meaty, savory comfort food — you genuinely won't miss the noodles
- Why You'll Love It: This zucchini lasagna recipe has all the flavor of classic lasagna at only 266 calories and 24 grams of protein per serving, with one key technique that keeps it from ever getting watery.
- Difficulty Level: Worth every minute
When it comes to comfort food, lasagna is one of the best — and as you can probably tell from the sheer number of zucchini recipes on this site, I'm also quite the fan of the vegetable. So when our garden was overflowing one summer, I set to work developing a zucchini lasagna recipe that had all the comfort of the original but none of the noodles.
What makes this zucchini lasagna recipe genuinely great (not just "pretty good for being healthy") is two things: first, sautéing the zucchini before layering removes excess moisture so the lasagna stays firm and sliceable rather than watery and soupy. Second, the sauce. A good marinara, doctored with balsamic vinegar and simmered until thick, makes every layer deeply flavorful.
At just 266 calories and 24 grams of protein per serving, neighbors, friends, and taste-testers alike are always shocked at how wholesome this actually is. Even kids eat it happily.
If you're on a zucchini kick, you'll also love my Sautéed Squash, Banana Zucchini Bread, and Chocolate Zucchini Muffins — great ways to work through a garden haul.

Why You'll Love This Zucchini Lasagna
- Only 266 calories per serving — all the comfort, none of the guilt
- 24 grams of protein — thanks to the ground beef, eggs, and three types of cheese
- Naturally gluten-free and low carb — no substitutions needed
- Never watery — the sauté technique is the game-changer (more on that below)
- Great for meal prep and make-ahead — assembles up to 24 hours ahead and reheats beautifully
- Family-friendly — a crowd-pleaser even for vegetable skeptics
How to Remove Water from Zucchini
This is the most important section in this entire post. The #1 reason zucchini lasagna fails is excess moisture — zucchini is about 95% water, and if you skip this step, you'll end up with a watery, soggy mess that slides apart on the plate.
When zucchini bakes in the oven, it releases its moisture into the dish. Without pre-cooking, that water has nowhere to go except into your sauce and cheese layers — turning a beautiful lasagna into soup.
Method 1: Sauté (Chelsea's preferred method) Heat olive oil in a large skillet over medium-high heat. Add the zucchini slices in a single layer with a pinch of salt and sauté for 6–8 minutes, flipping every 1–2 minutes, until the moisture has released and evaporated and the edges are starting to brown. This is the fastest method and also develops the zucchini's flavor — you get a slight caramelization that adds incredible flavor to the finished dish.
How to know it's done: the zucchini will look noticeably drier, will have shrunk slightly, and the pan will no longer have visible liquid pooling. If you're seeing a lot of water, give it another minute or two.
Method 2: Salt and drain Lay the zucchini slices flat on a wire rack set over a baking sheet. Sprinkle both sides generously with kosher salt and let sit for 30 minutes. The salt draws the water out through osmosis. Pat very dry with paper towels before using. This works well but takes more time and can make the zucchini slightly saltier — adjust your seasoning accordingly.
Method 3: Oven roast Spread zucchini slices on a parchment-lined baking sheet, brush lightly with olive oil, and roast at 400°F for 15–20 minutes. Deepest flavor of all three methods, but adds the most time. Great option if you want to multitask while the oven preheats.
Important Ingredients and Substitutions


Zucchini — Look for firm, dark green zucchini with smooth skin. I recommend small zucchini — they have a superior texture and more delicate flavor. Large zucchini can be woody and seedy, which doesn't work as well here. You'll need about 4 small zucchini for a 9x13 pan.
Marinara sauce — The sauce is a big part of the flavor profile, so use one you actually love. For a low-carb meal, look for a low-sugar option — some brands sneak in a surprising amount. Trader Joe's Rustico and Rao's Homemade are great picks. You can also use my Homemade Spaghetti Sauce in place of jarred sauce.
Ground beef — 85% or 90% lean is ideal. You get enough fat for flavor without excess grease. Ground turkey or Italian chicken sausage also works — see Variations for more info.
Whole milk ricotta — Don't sub part-skim if you can help it. Whole milk ricotta is creamier, richer, and far more flavorful in the finished dish.
Frozen spinach — Goes straight from frozen into the sauce — no thawing needed. If using fresh baby spinach, add 5 oz in the last 2 minutes of simmering so it doesn't get mushy.
Balsamic vinegar — A small amount adds depth and a slight tang that makes the meat sauce taste like it's been simmering all day. Don't skip it.
Parmesan — Use grated (not shredded or shaved) and go for the natural refrigerated type, not the green bottle. Use Parmigiano-Reggiano if you can swing it.
How to Slice Zucchini for Lasagna
|
Thickness |
⅛ inch is the sweet spot — thin enough to layer easily and cook through, thick enough to hold up to the sauce and cheese without disappearing. |
|
Direction |
Slice lengthwise, not crosswise. Long planks lay flat and create sturdy layers that hold up to the sauce and cheese. |
|
Tool |
A mandoline gives you perfectly consistent slices in seconds. A sharp chef's knife works too — just go slowly and try to keep the thickness even. |
|
How Many Zucchini |
For a standard 9x13 pan, 4 small or 2 large zucchini gives you enough for two complete layers. |
The Ricotta Layer
The ricotta mixture is what makes this lasagna feel truly indulgent. Whisk it smooth before spreading for the best texture:
- Ricotta vs. cottage cheese: Ricotta wins every time for texture and flavor. Cottage cheese is a workable substitute but has more water content and a more pronounced flavor. If you use it, drain it well first and blend it briefly for a smoother texture.
- Dairy-free option: Dairy-free ricotta (cashew-based or tofu-based) works in this recipe. The texture won't be quite as creamy, but the result is still good.
- Seasoning the ricotta: Don't skip the Italian seasoning, salt, and parmesan — an unseasoned ricotta layer tastes flat and one-dimensional. Season generously.
- The eggs: The eggs bind the ricotta and help the layers hold together when you scoop. Don't leave them out.

Recipe Variations
This recipe is delicious as written, but easy to adapt — here are some of my favorite ways to make it your own:
- Ground Turkey — A leaner option with virtually the same flavor. Ground turkey breast keeps it even lower in fat; a blend of breast and thigh adds more juiciness.
- Italian Sausage — Swap the ground beef for raw Italian chicken or turkey sausage for a more heavily seasoned, fennel-forward sauce.
- Vegetarian — Skip the meat entirely, sautéing 8 oz of sliced mushrooms instead, and add an extra cup of frozen spinach into the sauce.
- Veggie Swap — Thinly sliced eggplant, portobello mushrooms, yellow squash, or sweet peppers all work in place of or alongside the zucchini. Sauté them first, just like the zucchini.
- Extra Cheesy — Add a thin layer of additional mozzarella between each ricotta layer, or finish with a sprinkle of parmesan in the last 5 minutes of baking.
How to Make Zucchini Lasagna
For the complete recipe and measurements, scroll to the recipe card at the bottom of this post.
Prepare: Preheat the oven to 375°F and spray a 9x13" baking dish with non-stick cooking spray.

Step 1: Heat a large non-stick skillet over medium-high heat. Add the olive oil and heat until shimmering. Add the zucchini and ¼ teaspoon salt. Sauté for 6–8 minutes, flipping every 1–2 minutes, until the moisture has evaporated and the zucchini turns golden brown. Remove from the pan and set aside.

Step 2: Wipe out the pan and return it to the heat. Add the ground meat, onion, and garlic powder. Cook, crumbling as you stir, for 4–5 minutes until cooked through.

Step 3: Add the marinara sauce, balsamic vinegar, and frozen spinach. Stir well and bring to a simmer. Reduce the heat to medium-low and cook uncovered for 10–13 minutes until the sauce is a deep red and thick. Season with black pepper. Remove from heat.

Step 4: In a medium bowl, whisk together the ricotta, eggs, Italian seasoning, remaining ¼ teaspoon salt, and parmesan until smooth.

Step 5: Spread half the meat sauce evenly in the bottom of the prepared baking dish. Layer half the zucchini on top.

Step 6: Dollop and spread half the ricotta mixture over the zucchini. Sprinkle with half the mozzarella. Repeat the layers with the remaining ingredients.

Step 7: Bake uncovered for 40–45 minutes until bubbling around the edges and golden brown on top.
Step 8: Remove from the oven and let rest for 5–10 minutes before slicing and serving.
Chelsea's Recipe Pro-Tips

- Don't skip sautéeing the zucchini — This is the step that separates a perfect lasagna from a watery one. If the zucchini is still releasing liquid after 6 minutes, give it another 1–2 minutes until the pan looks dry.
- Simmer the sauce until thick — A runny sauce makes a runny lasagna. Cook it down until it's a deep red and has a thick, scoopable consistency — about 10–13 minutes uncovered.
- Use a quality marinara — You'll taste every bit of it. This isn't the time for the store-brand jar in the back of the pantry.
- Let it rest before cutting — 10 minutes minimum. The layers need to set after coming out of the oven. Cut too early and everything slides apart.
- Grate your own mozzarella — Pre-shredded has anti-caking agents that prevent beautiful melting and browning. Fresh-grated melts more evenly and gives you that golden top.
- Grass-fed beef if budget allows — Better flavor and a more wholesome fat profile (source). Ground meat is typically the most affordable grass-fed cut.
Make-Ahead & Storage
- Make-ahead: Assemble the lasagna fully through Step 6, cover tightly with aluminum foil, and refrigerate for up to 24 hours before baking. Let the lasagna warm at room temperature for 30-60 minutes before baking or 5–10 minutes to the bake time since if starting cold.
- Refrigerating: Leftovers keep covered for 4–5 days. The flavor improves overnight.
- Freezing: Freeze in 1–2 serving portions in freezer-safe containers for up to 3 months. Thaw in the refrigerator for 24 hours before reheating.
- Reheating in the microwave: Cover with a paper towel and heat on gentle power in 1–2 minute intervals until heated through.
- Reheating in the oven: Place in an oven-safe dish, cover with foil, and heat at 350°F for 10–20 minutes, depending on portion size.

Serving Suggestions
This zucchini lasagna is hearty enough to be a complete meal on its own — but it pairs beautifully with a simple green salad and crusty Air Fryer Garlic Bread for company. For a lighter spread that keeps things low carb, Air Fryer Green Beans, Roasted Broccoli, or Kale Slaw are all natural fits.
For a dinner party spread, Garlic Angel Hair Pasta makes a great carb addition alongside the lasagna for guests who want a carb boost.
Zucchini Recipe FAQs
The key is removing excess moisture from the zucchini before layering. Sauté the zucchini slices in olive oil for 6–8 minutes until the liquid evaporates and the edges start to brown. Also, simmer the meat sauce until thick, and always let the lasagna rest for at least 5–10 minutes before slicing so any remaining liquid reabsorbs into the dish.
Yes — assemble fully, cover tightly, and refrigerate for up to 24 hours before baking. Let the lasagna warm at room temperature for 30-60 minutes before baking or 5–10 minutes to the bake time since if starting cold.
No — the skin is thin, tender, and edible. It also helps the slices hold their shape during cooking.
Yes. Freeze in individual portions in freezer-safe containers for up to 3 months. Thaw overnight in the refrigerator before reheating.
For a standard 9x13 pan with two complete layers, you'll need about 4 small or 2 large zucchini.
Absolutely — yellow squash works exactly the same way and has a very similar flavor and texture. Use all yellow squash or a mix of both.
Yes — this recipe is naturally keto and low carb. Just make sure your marinara sauce doesn't have added sugars.
This recipe has 266 calories per serving (1/12 of the pan), with 24g of protein, 14g of fat, and 10g of carbs.
Save this Recipe for Later on Pinterest

More Zucchini Recipes


If you liked and made this Zucchini Lasagna Recipe, don't forget to rate it and let me know how you liked it in the comments. I always love hearing from you!
Recipe Card
Zucchini Lasagna
Equipment
- Mandoline optional
Ingredients
Zucchini
- 1 tablespoon olive oil
- 4 small zucchini sliced lengthwise into ⅛-inch planks
- ½ teaspoon salt divided
Meat Sauce
- 1 lb ground beef 85% or 90% lean, or ground turkey
- ½ large onion about 1¼ cups, diced into ¼-inch pieces
- ½ teaspoon garlic powder or 1½ teaspoons fresh minced garlic
- 1 24 oz jar marinara sauce low-sugar if preferred
- 1½ tablespoons balsamic vinegar
- 1½ cups frozen chopped spinach
- ⅛ - ¼ teaspoon black pepper
Ricotta and Cheese Layers
- 1½ cups whole milk ricotta cheese
- 2 large eggs
- ¾ teaspoon Italian seasoning
- ¼ cup grated parmesan cheese
- 2 ¼ cups shredded part-skim mozzarella cheese
Instructions
- Preheat the oven to 375°F. Spray a 9x13" baking dish with non-stick cooking spray.
- Heat a large non-stick skillet over medium-high heat. Add olive oil and heat until shimmering. Add the zucchini and ¼ teaspoon salt. Sauté for 6–8 minutes, flipping every 1–2 minutes, until the moisture has evaporated and the zucchini turns golden brown. Remove from the pan and set aside.
- Wipe out the pan and return it to the heat. Add the ground meat, onion, and garlic powder to the same pan. Cook, crumbling as you stir, for 4–5 minutes until cooked through.
- Add the marinara sauce, balsamic vinegar, and frozen spinach. Stir well and bring to a simmer. Reduce the heat to medium-low and cook uncovered for 10–13 minutes, until the sauce is deep red and thick. Season with black pepper. Remove from heat.
- In a medium bowl, whisk together the ricotta, eggs, Italian seasoning, remaining ¼ teaspoon salt, and parmesan until smooth.
- Spread half the meat sauce evenly in the bottom of the baking dish. Layer half the zucchini on top. Dollop and spread half the ricotta mixture over the zucchini. Sprinkle with half the mozzarella. Repeat the layers with the remaining ingredients.
- Bake uncovered for 40-45 minutes, until bubbling around the edges and golden brown on top.
- Remove from the oven and let rest for 5–10 minutes before slicing and serving.
Notes
- Don't skip sautéing the zucchini — this removes excess moisture and is what keeps the lasagna from getting watery.
- Make-ahead: Assemble through Step 6, cover tightly, and refrigerate up to 24 hours. Add 5–10 minutes to bake time.
- Meat swap: Ground turkey or Italian chicken or turkey sausage work in place of ground beef.
- Spinach: No need to thaw — add frozen spinach directly to the sauce. For fresh, add 5 oz in the last 2 minutes of simmering.
- Ricotta swap: Cottage cheese can substitute — drain it well first and blend if desired.
- Storage: Refrigerate, covered, for 4–5 days, or freeze in individual portions for up to 3 months.

Delicious! Everyone loved this recipe, even my vegetable hating teenager! I will definitely be making this again.
Yes!! I am so glad to hear that! 😀
Hi this looks yummy. I’m going to try it tonight. For the frozen spinach should it be defrosted and moisture squeezed out first? or do you add it to sauce and let it defrost and cook in there?
Hi Jennifer!
Nope, the spinach does not need to be thawed or squeezed out first. The moisture will cook off on the stovetop.
Hope this helps and that you enjoy it! Would love to hear how it goes.
Thanks so much,
Chelsea
It turned out amazing! My husband gobbled it up! Thank you so much.
Oh, I am so excited to hear that! Thanks for reviewing and sharing!